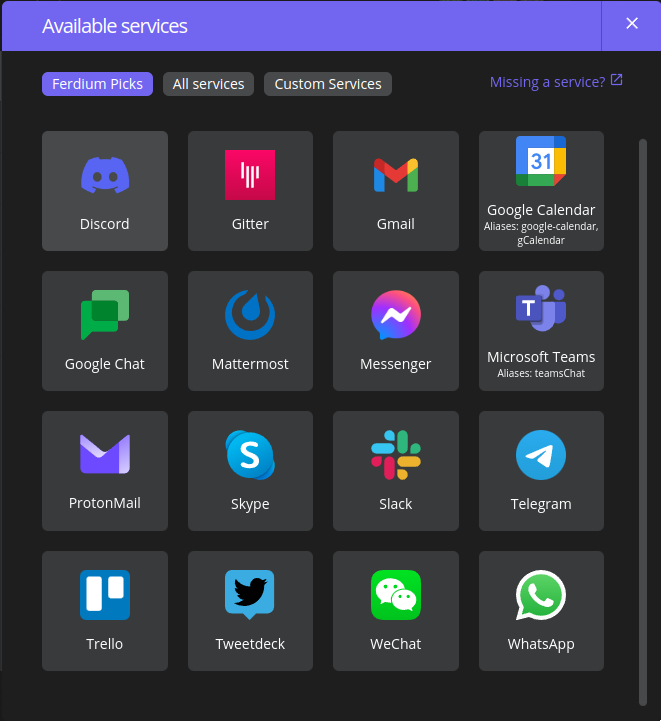
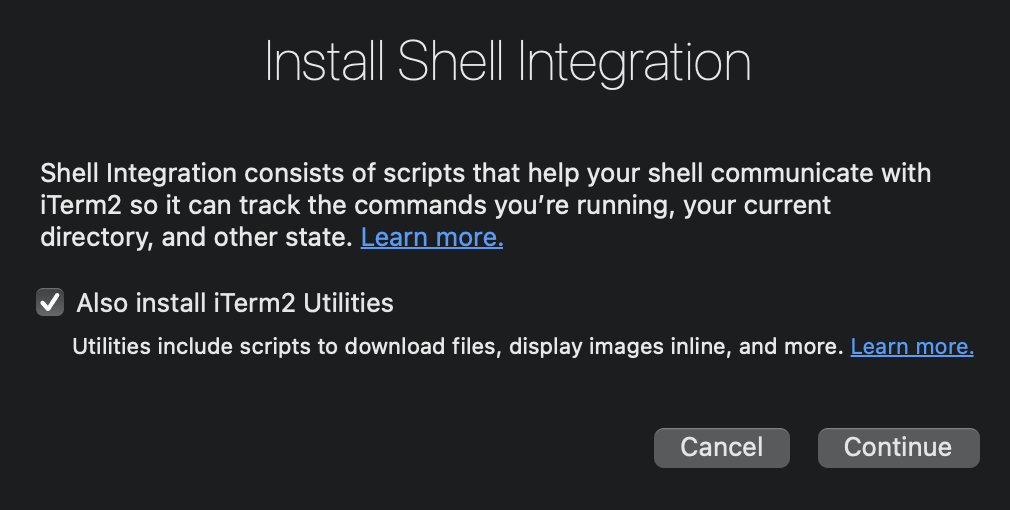
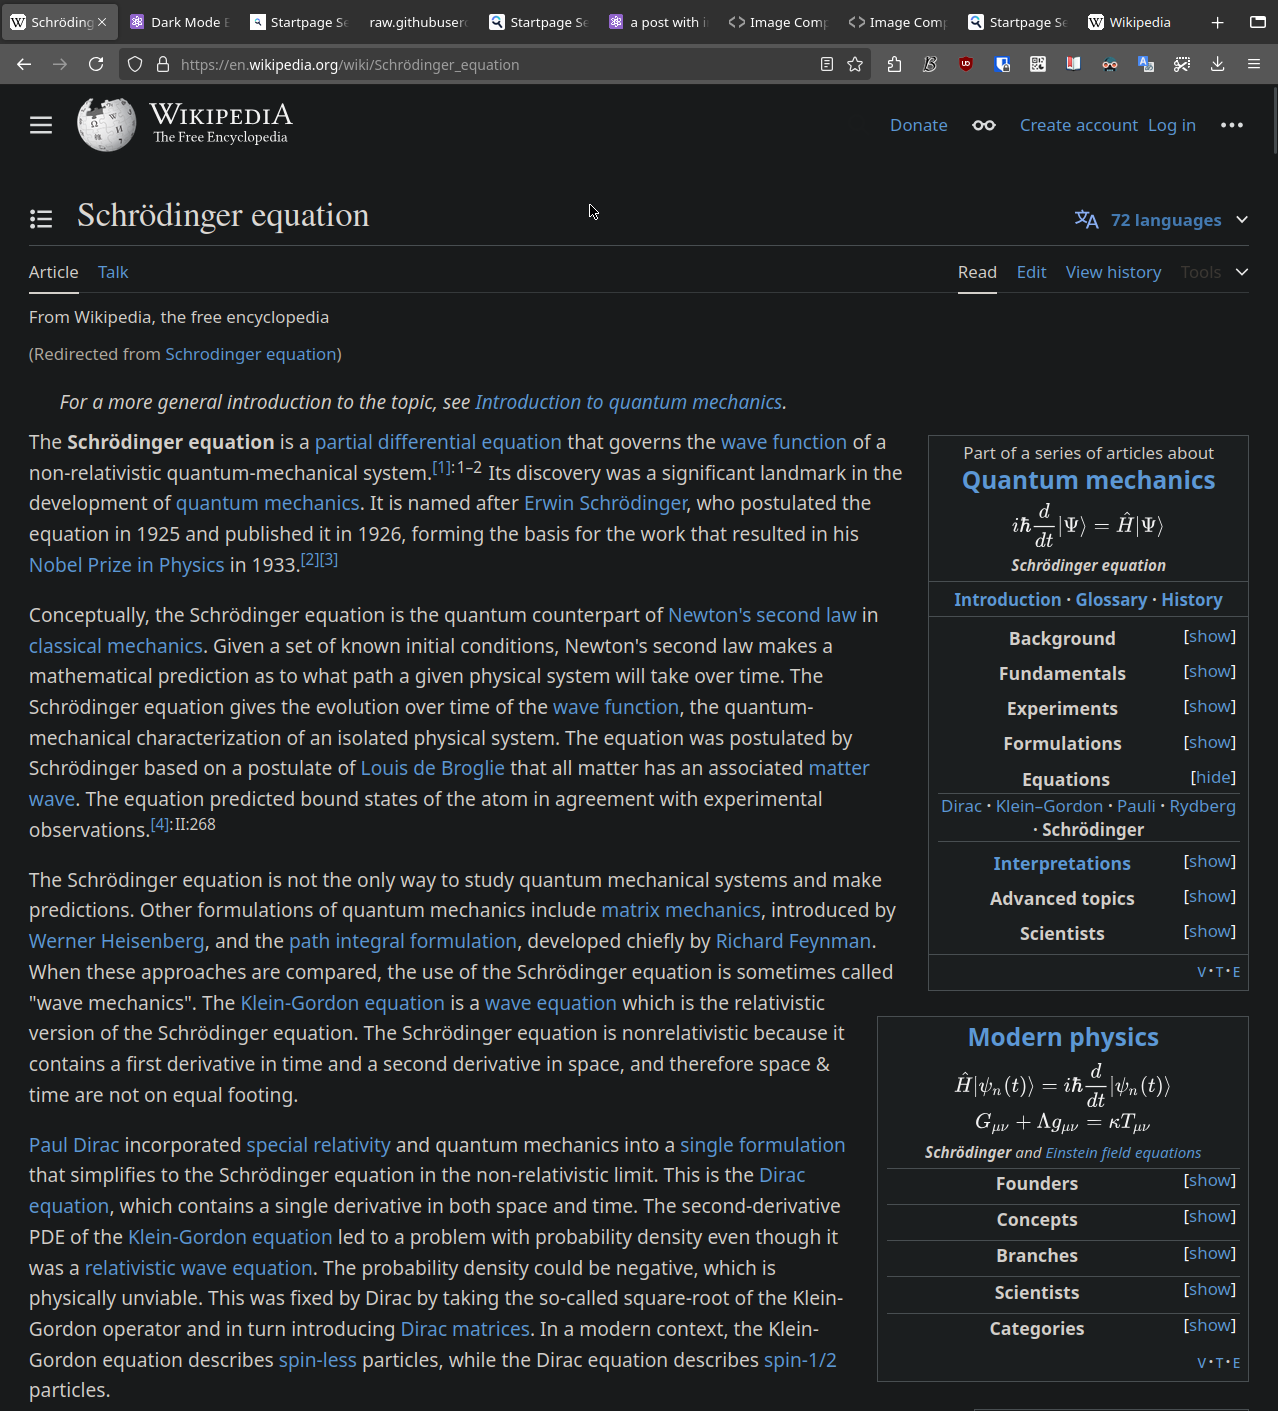
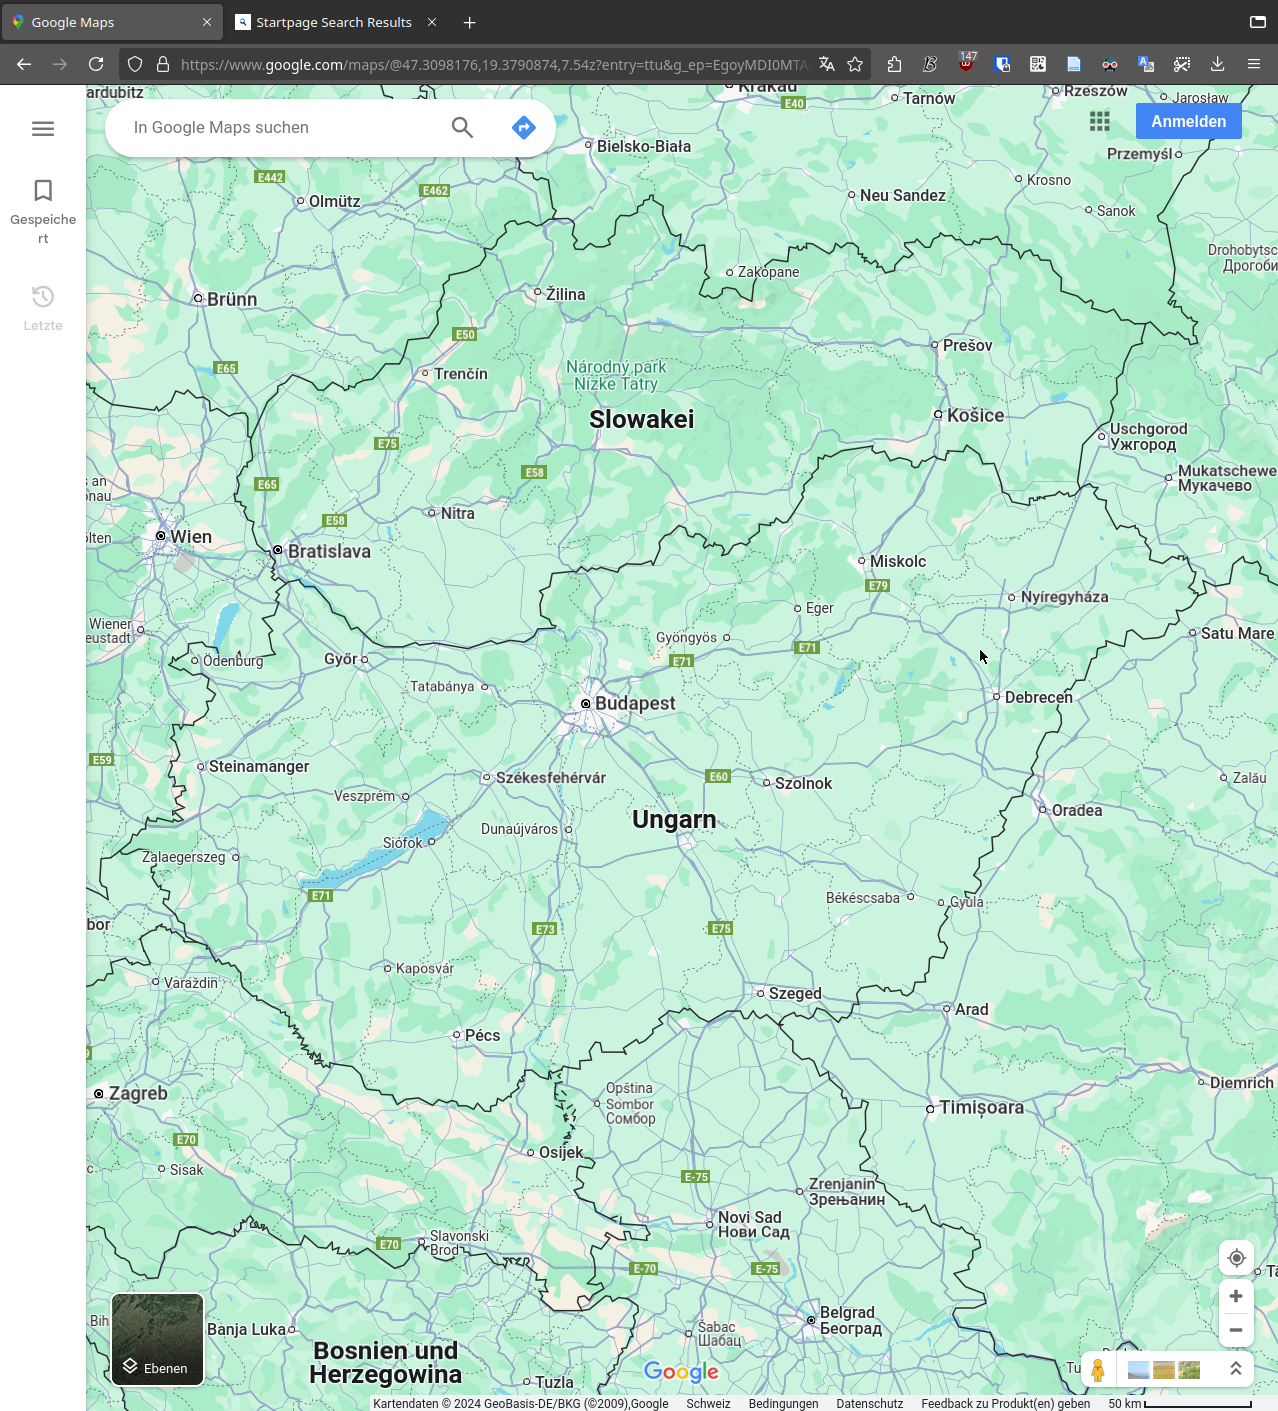
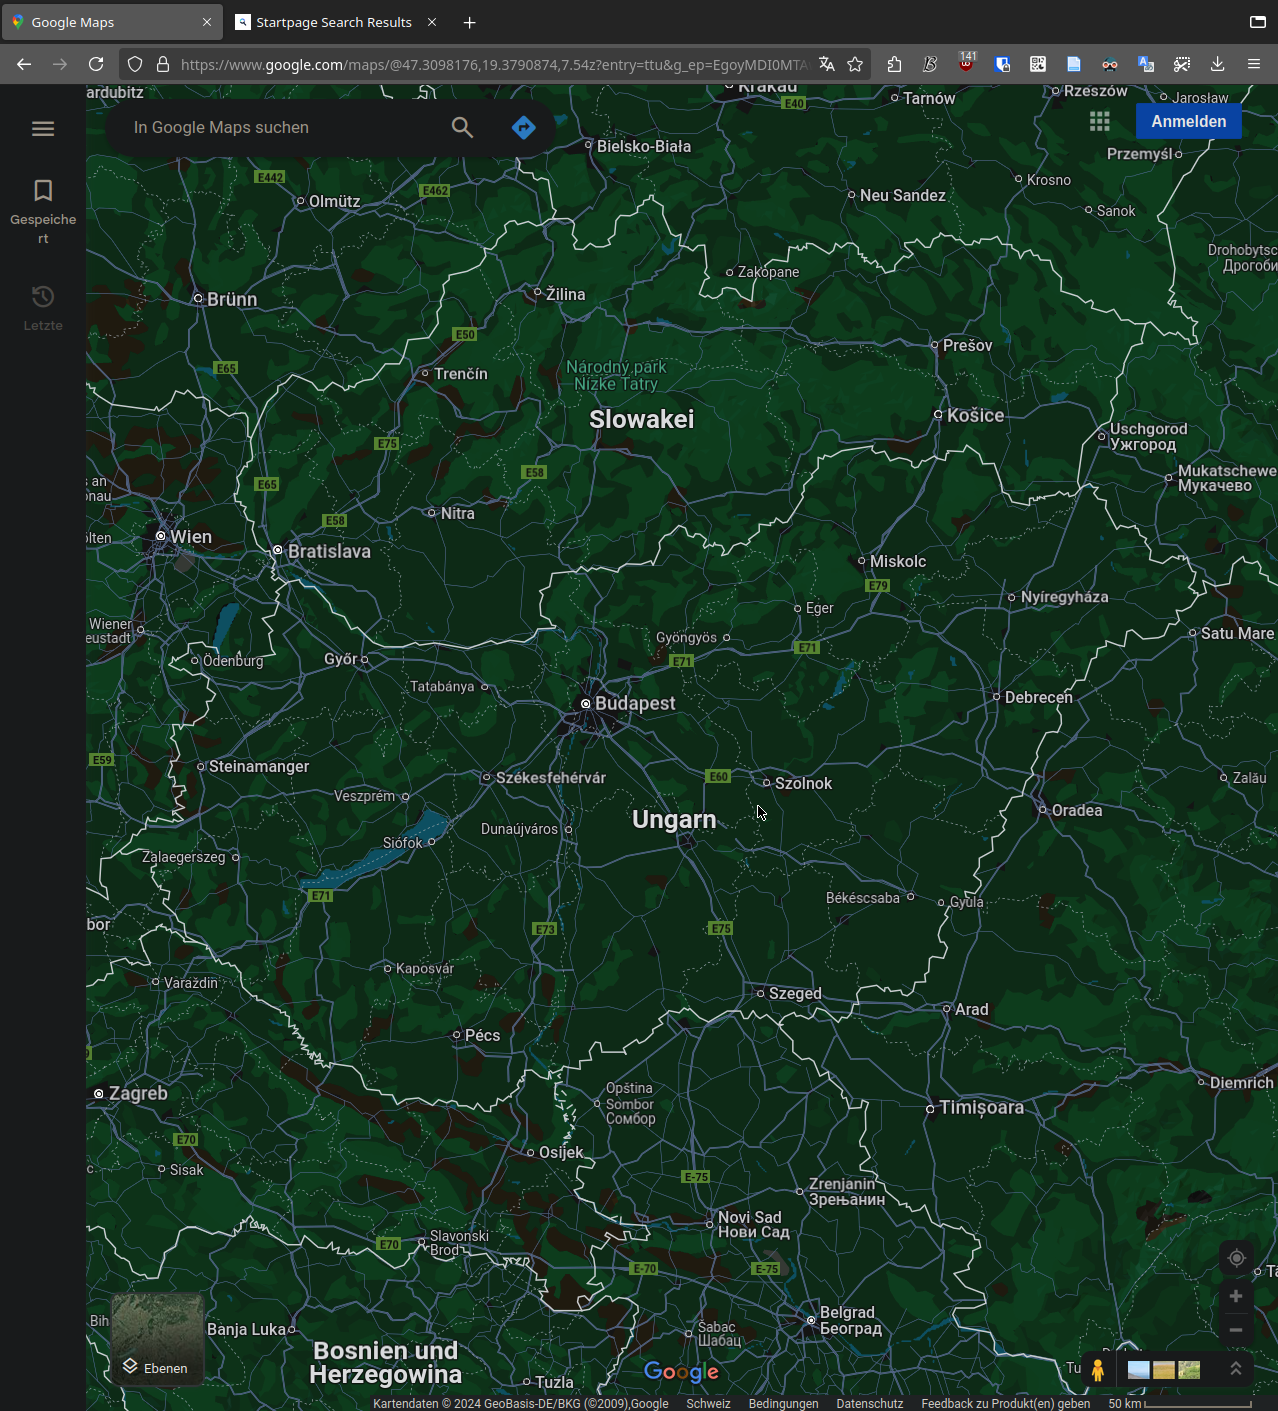
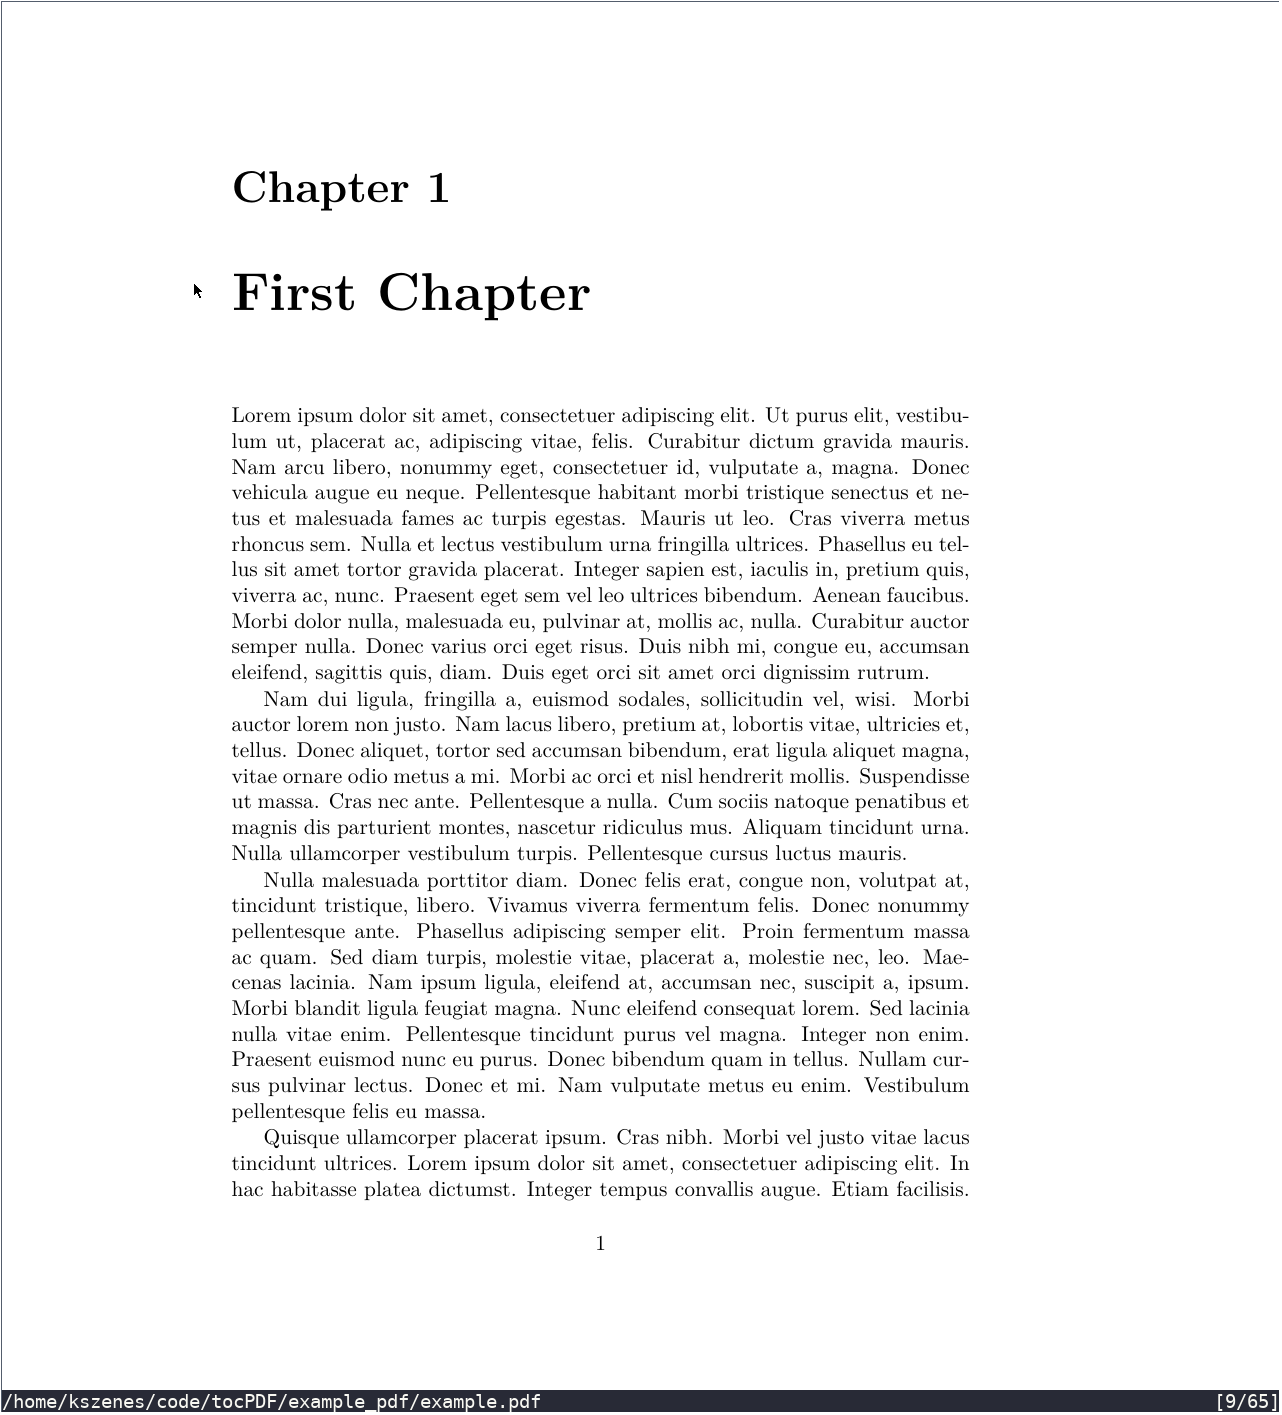
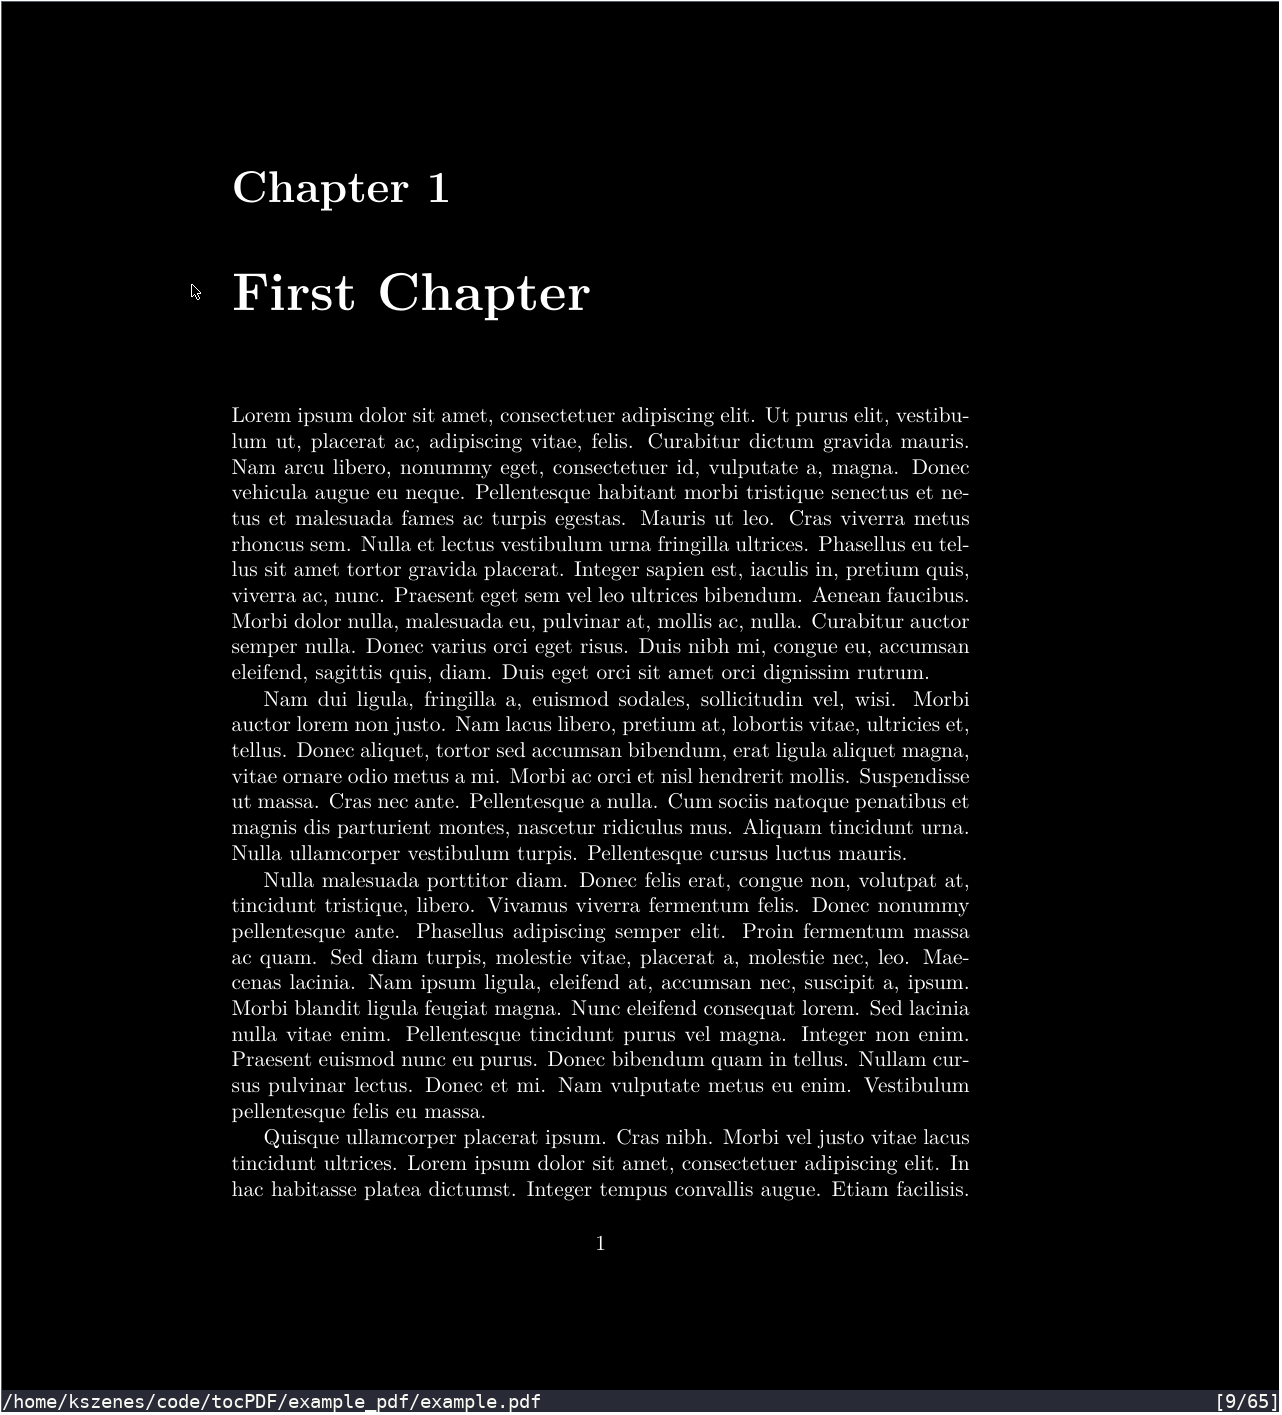
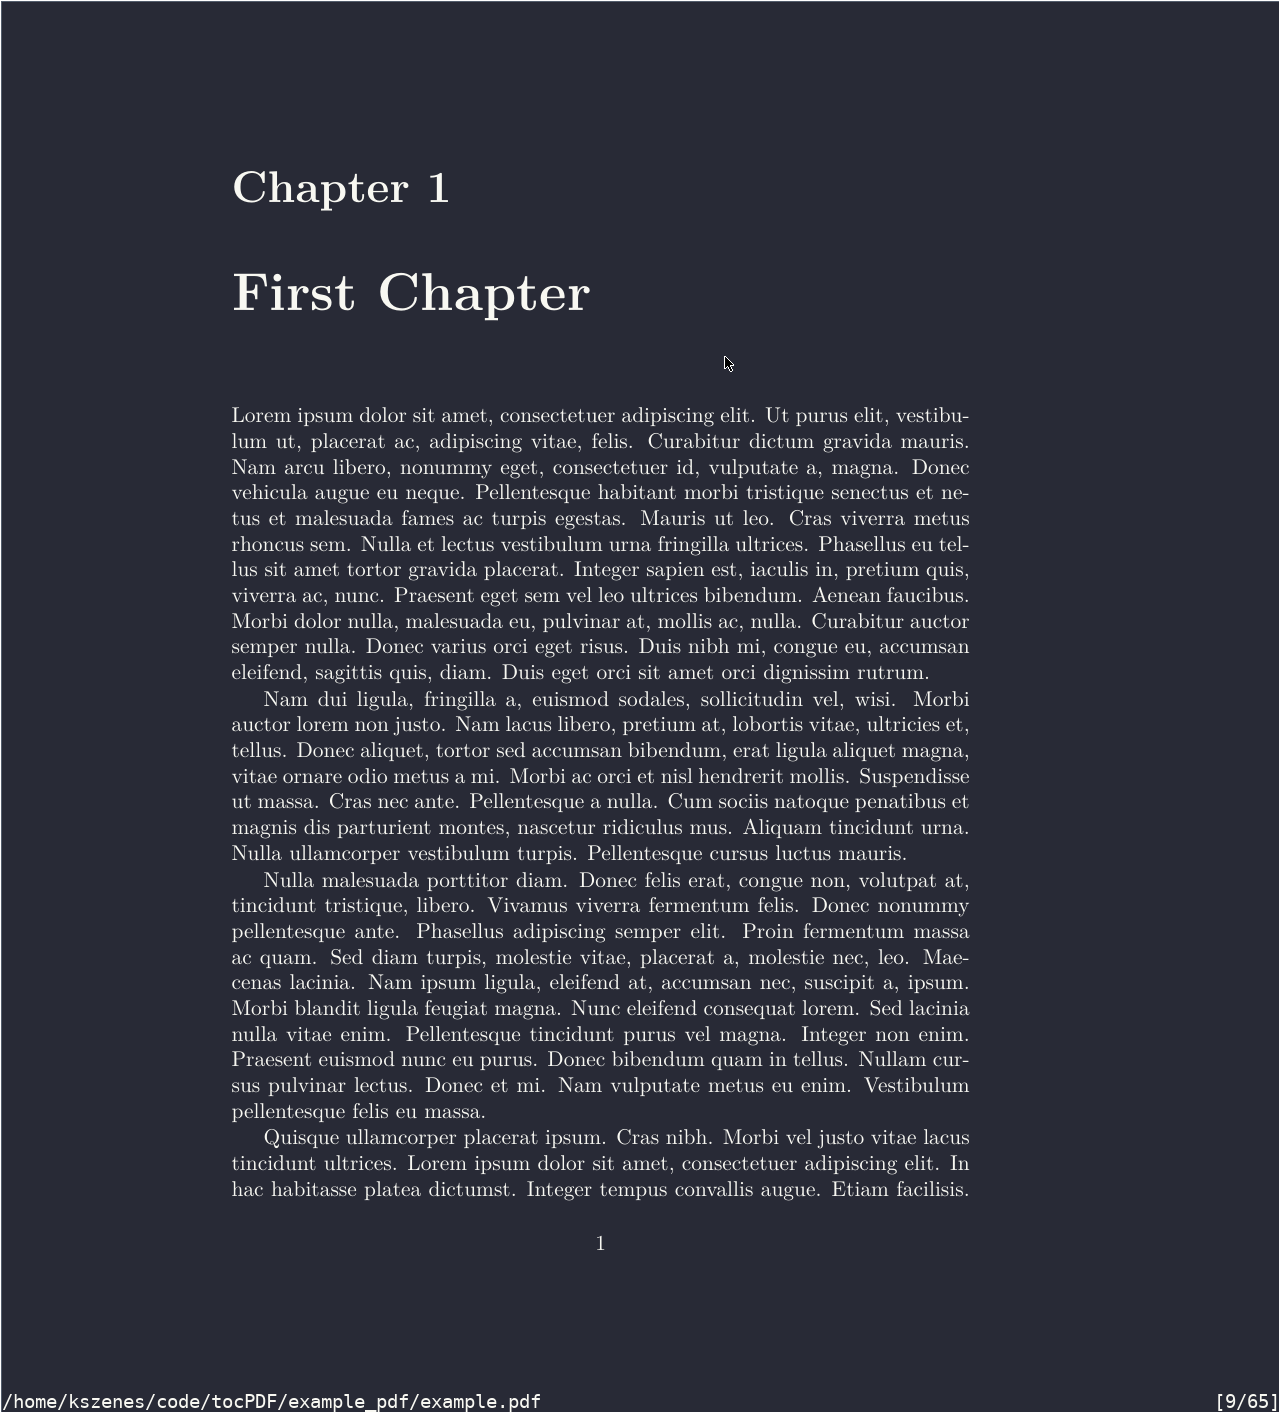
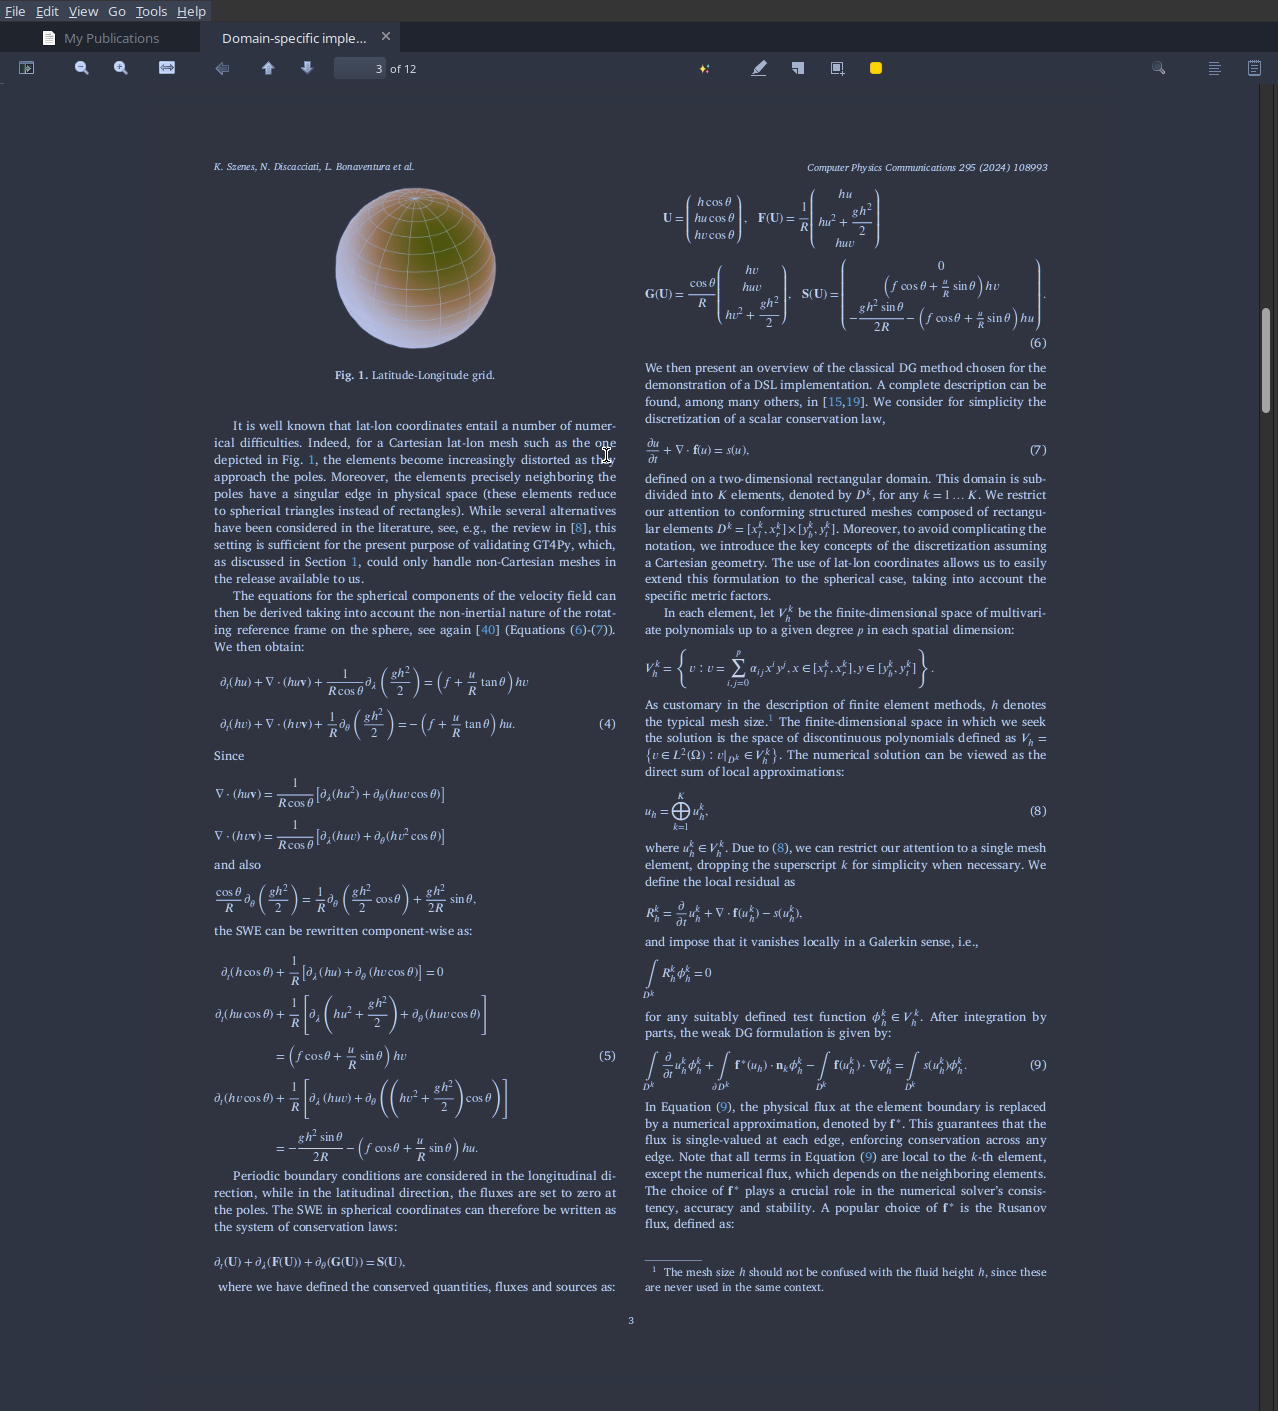
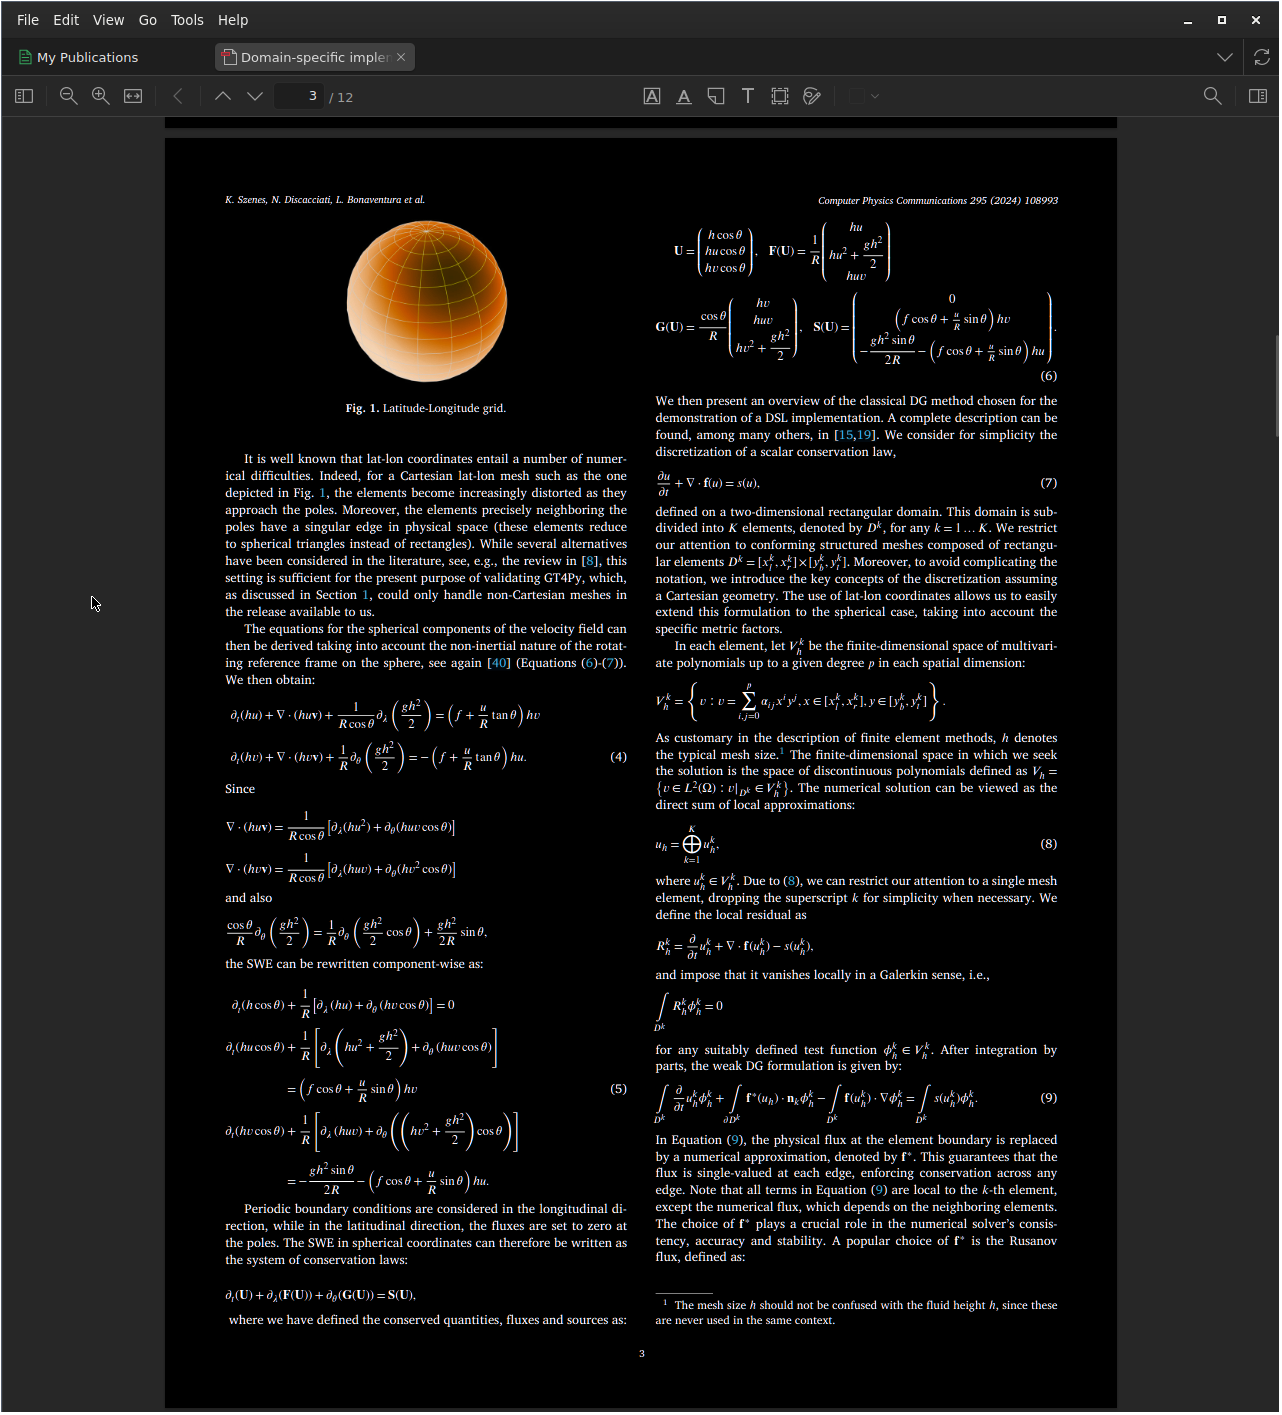
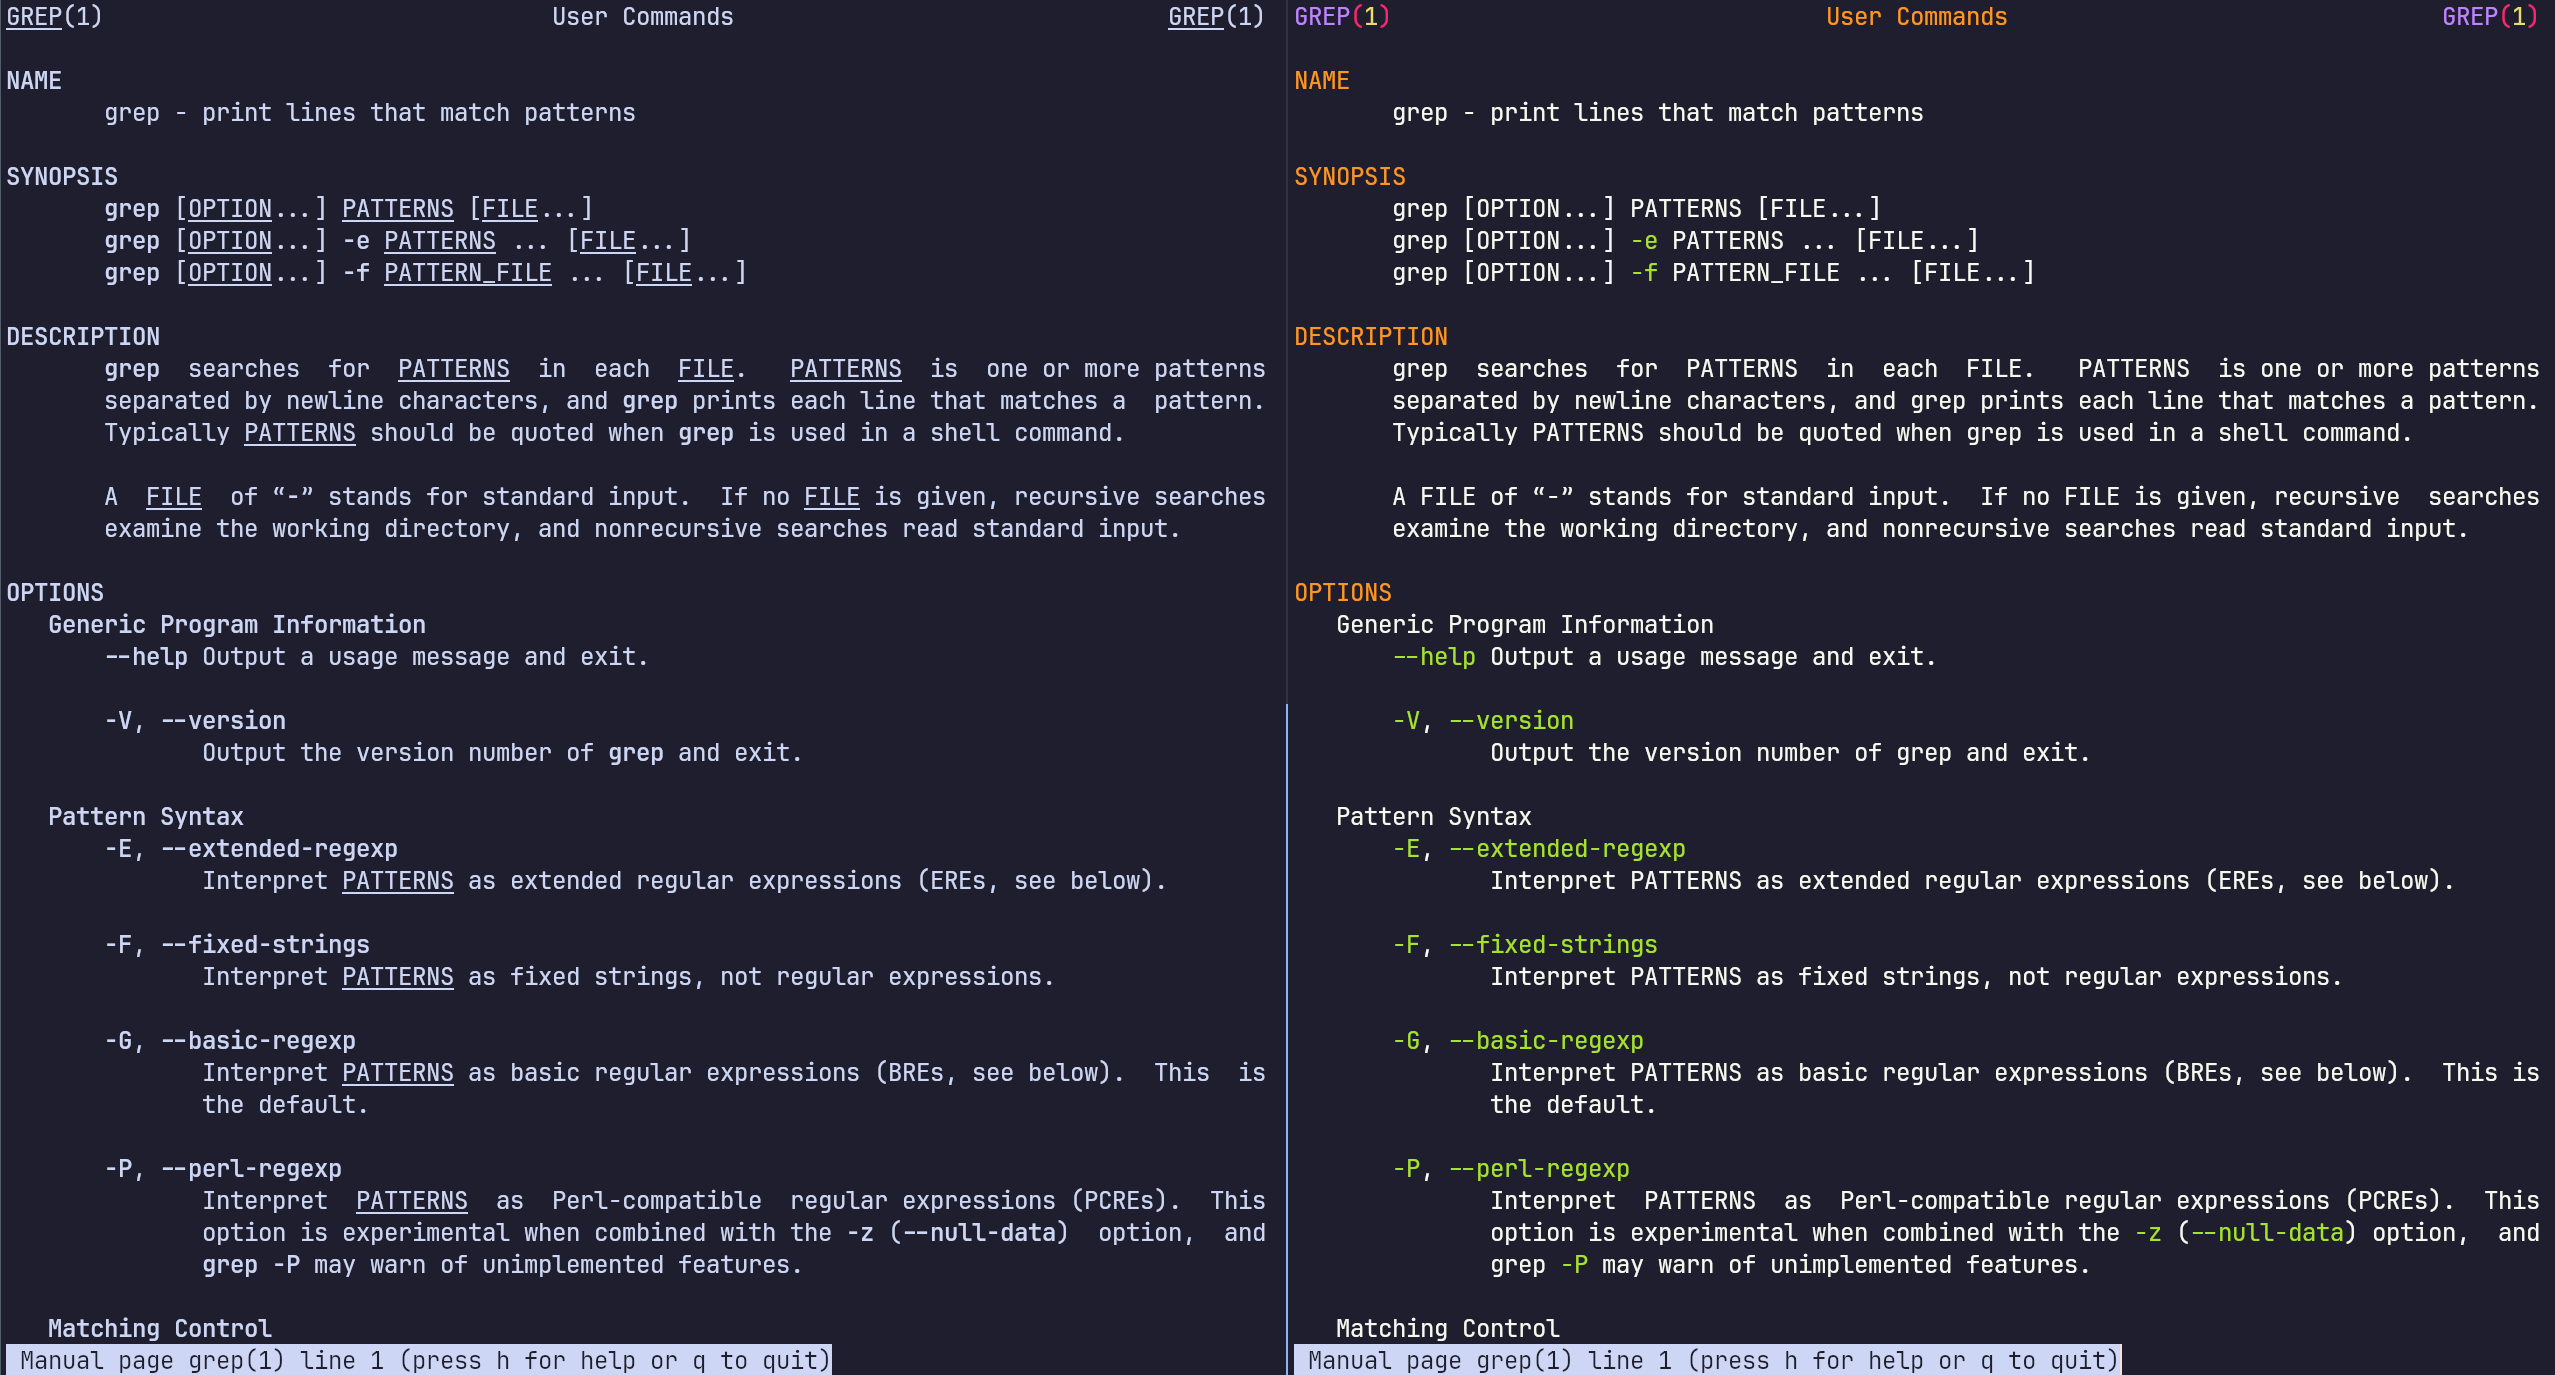
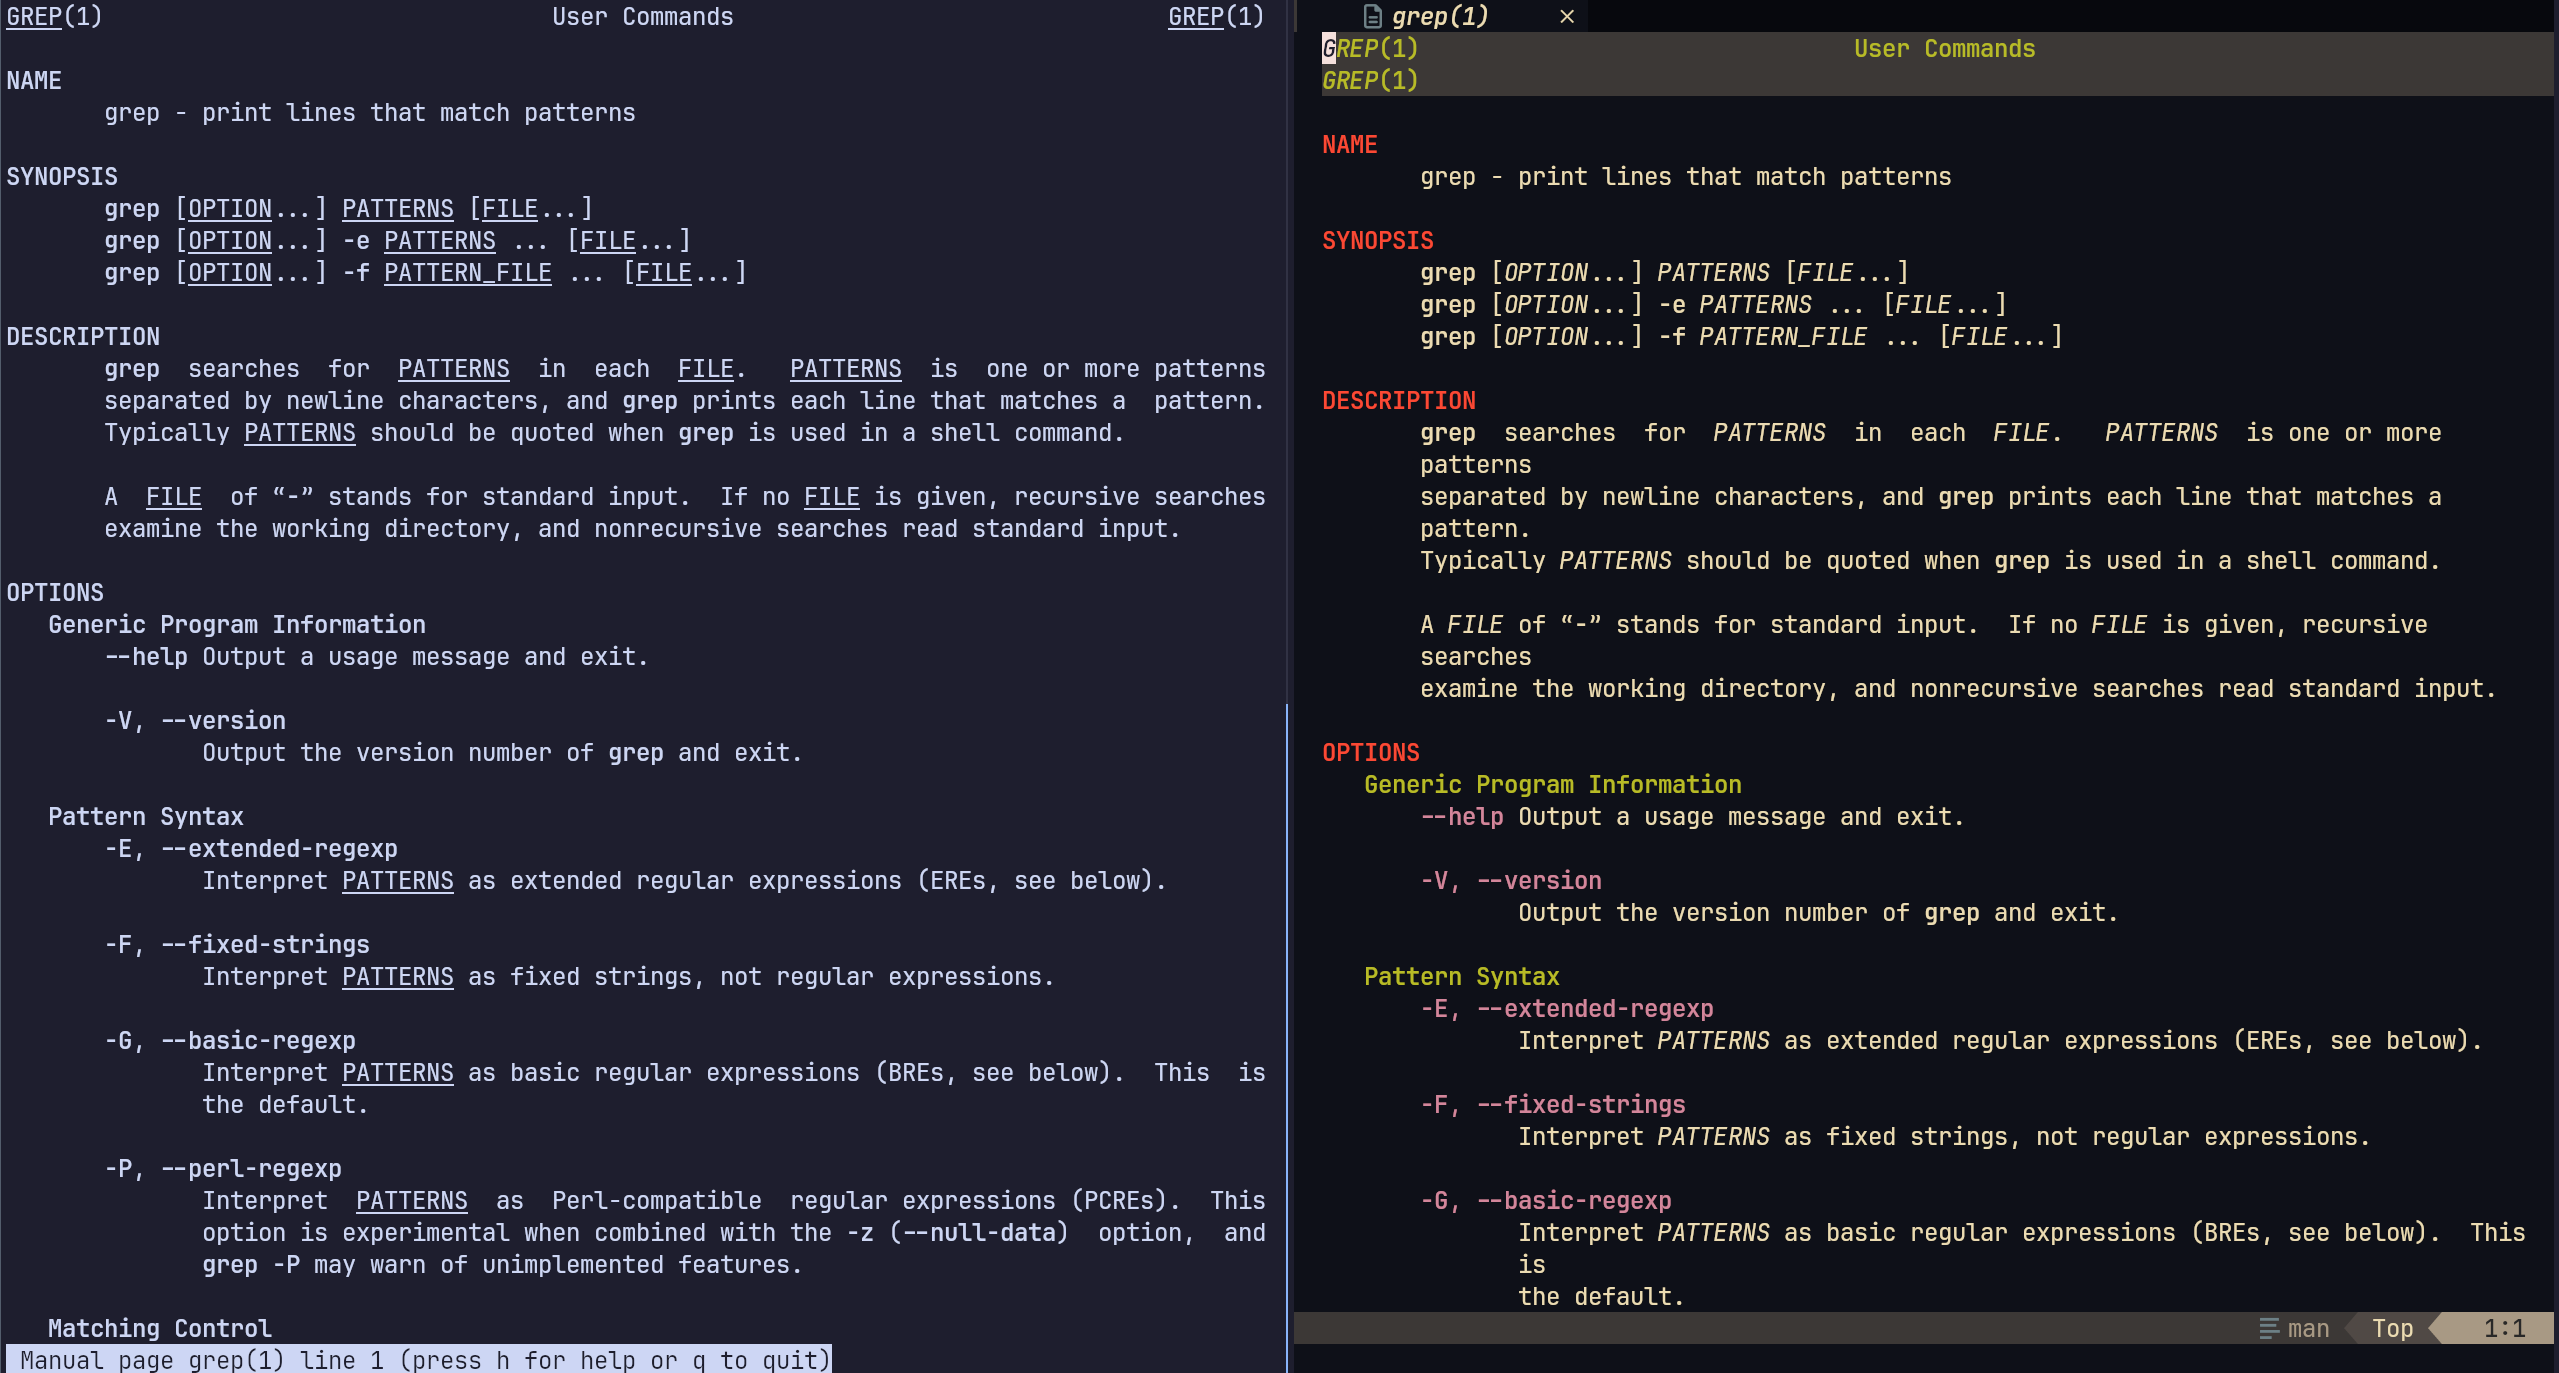
<?xml version="1.0" encoding="utf-8"?><feed xmlns="http://www.w3.org/2005/Atom" xml:lang="en"><generator uri="https://jekyllrb.com/" version="4.4.1">Jekyll</generator><link href="https://kszenes.github.io/feed.xml" rel="self" type="application/atom+xml"/><link href="https://kszenes.github.io/" rel="alternate" type="text/html" hreflang="en"/><updated>2026-07-19T11:45:52+00:00</updated><id>https://kszenes.github.io/feed.xml</id><title type="html">Kalman Szenes</title><entry><title type="html">Never Miss an Important Publication</title><link href="https://kszenes.github.io/blog/2025/ResearchKeepUp/" rel="alternate" type="text/html" title="Never Miss an Important Publication"/><published>2025-02-16T00:00:00+00:00</published><updated>2025-02-16T00:00:00+00:00</updated><id>https://kszenes.github.io/blog/2025/ResearchKeepUp</id><content type="html" xml:base="https://kszenes.github.io/blog/2025/ResearchKeepUp/"><![CDATA[<h2 id="introduction">Introduction</h2> <p><strong>Keeping up</strong> with the <strong>latest developments</strong> in one’s field of research is becoming <strong>increasingly challenging</strong>. New articles are published daily across numerous journals, and preprint repositories—most notably arXiv—further adding to the overwhelming volume of new information. <strong>Staying informed</strong>, however, remains <strong>essential</strong>.</p> <p>In this blog post, I will share <strong>my workflow for staying up to date with the latest publications as they are released</strong>, minimizing the risk of missing important research. This approach is highly personalized and may not suit everyone, but I hope readers can find valuable insights to incorporate into their own routines.</p> <h3 id="-google-scholar-alerts">🔔 Google Scholar Alerts</h3> <p>Google Scholar is the go-to resource for searching articles on specific topics, tracking an author’s publications, and—if you are so inclined—checking your standing in the academic world through various debatable impact metrics.</p> <p>Most researchers are aware that Google Scholar allows users to set up <strong>alerts for new publications</strong> based on <strong>search terms</strong>. This feature <strong>periodically sends email</strong> notifications with recent papers matching the specified query. However, keep in mind that Google Scholar scans for the search term anywhere in a publication, not just in the title. As a result, you may receive a <strong>high volume of loosely related papers</strong> that merely mention the term. To minimize this noise, I recommend <strong>keeping these alerts limited</strong> to <strong>highly specific search terms</strong>.</p> <p>Another useful feature is setting up <strong>alerts based on an author’s name</strong>. If an author has a Google Scholar profile, you can easily follow them by clicking the <code class="language-plaintext highlighter-rouge">Follow</code> button in the top right corner of their profile.</p> <figure> <picture> <source class="responsive-img-srcset" srcset="/assets/img/blog/gscholar-follow-link.png" sizes="95vw"/> <img src="/assets/img/blog/gscholar-follow-link.png" class="img-fluid rounded z-depth-1" width="100%" height="auto" loading="eager" onerror="this.onerror=null; $('.responsive-img-srcset').remove();"/> </picture> </figure> <div class="caption"> A random aspiring researcher's Google Scholar page </div> <p>If a researcher does not have a Google Scholar profile, you can still track their publications by setting up an alert for their name.</p> <p>However, despite how it appears, following an author does <strong>not always guarantee</strong> that you will receive <strong>updates solely on their work</strong>. <strong>Publications</strong> from researchers with <strong>identical names</strong> are sometimes <strong>mistakenly included</strong> in the alerts.</p> <h4 id="-organizing-email-alerts">📩 Organizing Email Alerts</h4> <p>Once you have set up alerts for key topics and researchers, <strong>your inbox can quickly become cluttered</strong> with notifications from Google Scholar—especially if you have created numerous alerts. To keep things organized, I <strong>use email filters to automatically categorize</strong> these messages based on custom criteria.</p> <p>In Gmail, I filter all emails from Google Scholar alerts (identified by the email address <code class="language-plaintext highlighter-rouge">scholaralerts-noreply@google.com</code>) and move them <strong>out of my inbox into a dedicated label</strong>, in my case <code class="language-plaintext highlighter-rouge">.Google Scholar</code>. Since Gmail sorts labels alphabetically, as a personal convention, I prefix all my custom labels with a period (.), which insures that they are grouped together at the top of the <code class="language-plaintext highlighter-rouge">Labels</code> section in the sidebar menu.</p> <h4 id="️-downsides-of-google-scholar-alerts">⚠️ Downsides of Google Scholar Alerts</h4> <p>As mentioned earlier, <strong>relying solely on Google Scholar alerts</strong> to stay updated on research developments has its <strong>drawbacks</strong>. The system presents a trade-off: subscribing to a broad range of queries results in an overwhelming flood of non-relevant publications, while limiting alerts increases the risk of missing important papers.</p> <p>Google Scholar’s alerts are also not always precise with <strong>authors with common names</strong> often being <strong>misattributed</strong>. Furthermore, since Google Scholar relies on web crawlers to index new publications, there is typically a <strong>delay of several days or even weeks</strong> before a newly released paper appears in search results.</p> <p>While Google Scholar alerts can be a useful tool, they are best used in combination with other strategies to ensure timely and relevant updates.</p> <h3 id="-tracking-new-publications-from-specific-journals">📖 Tracking New Publications from Specific Journals</h3> <p>A highly effective way to stay updated on research is by <strong>following the latest articles</strong> published in <strong>key journals</strong> relevant to your field. This method complements the broader search capabilities of Google Scholar and often helps me <strong>discover important papers well before Google Scholar notifies me</strong> of them.</p> <h4 id="-rss-feeds">📡 RSS Feeds</h4> <p>While you could manually bookmark your favorite journals and check their homepages every morning, a far more efficient approach is to use <strong>RSS feeds</strong> to gather all this information in one place.</p> <p>“What are RSS feeds?”, you may wonder. Perhaps, you have come across this logo in the corner of some websites:</p> <div style="display: flex; justify-content: center;"> <img src="/assets/img/blog/rss-logo.png" style="max-width: 400px; height: auto;"/> </div> <div class="caption"> RSS logo </div> <p>RSS (Really Simple Syndication) is a long-standing technology, first introduced in 1999, that <strong>allows websites to distribute content in a standardized, machine-readable format</strong>. Websites with RSS feeds publish <strong>updates containing headlines, summaries, and links to full articles</strong>. In fact, RSS is the backbone of podcast distribution as well.</p> <p>With RSS, you can <strong>stay updated on new publications</strong> without visiting each journal’s website individually since <strong>most academic journals provide RSS feeds</strong> for their <strong>latest articles</strong>. Thankfully, this is also the case for arXiv, where you can subscribe to specific research areas, such as <em>Chemical Physics</em> (<code class="language-plaintext highlighter-rouge">physics.chem-ph</code>). More information on accessing specific arXiv RSS feeds are detailed <a href="https://info.arxiv.org/help/rss.html">here</a>.</p> <p>The quality of RSS feeds varies from journal to journal, but most include a <strong>table of contents (TOC) image, article title, abstract, and author list</strong>. Typically, this information is sufficient to assess whether a paper is relevant to your research.</p> <h5 id="-the-feeder-app-reader">📲 The Feeder App Reader</h5> <p>There are many RSS reader options available, but I highly recommend the open-source <a href="https://github.com/spacecowboy/Feeder">Feeder</a> app for Android. It is <strong>ad-free</strong>, features a <strong>clean UI</strong> with a native dark mode, and offers <strong>extensive customization</strong> options for tailoring the interface to your preferences.</p> <p>Feeder displays the <strong>TOC image</strong> alongside the article <strong>title</strong>, and selecting an article will (depending on the RSS feed) also show the <strong>author list and abstract</strong>.</p> <div style="display: flex; justify-content: center;"> <img src="/assets/img/blog/feeder-example.jpeg" style="max-width: 300px; height: auto;"/> </div> <div class="caption"> Example of the Feeder UI for the <em>J. Chem. Theory Comput.</em> journal's RSS feed </div> <p>If the article is <strong>open-access</strong>, Feeder can even <strong>fetch the entire article</strong> such that you can read directly from the app.</p> <p>The app allows you to <strong>group feeds by tags</strong>, making it easy to categorize subscriptions by topic. You can also <strong>star</strong> articles to save them for later reading. The app is actively maintained—I personally reached out to the developer with a feature request and received helpful support.</p> <p>I use Feeder as part of my morning routine to <strong>monitor key journals</strong> as well as my <strong>favorite blogs</strong>—a list of which you can find on my <a href="/resources">Resources</a> page.</p> <h5 id="-zotero-integration">📚 Zotero Integration</h5> <p>As a side note, if you are already using Zotero to manage your research papers, you will be happy to know that it has <strong>built-in RSS support</strong>, making it even easier to track and organize important publications.</p> <h2 id="-wrapping-up">🔍 Wrapping Up</h2> <p>Staying on top of the latest research can feel overwhelming, but with the right tools and strategies, it becomes much more manageable. Personally, I have found that <strong>RSS feeds for relevant journals</strong> and <strong>Google Scholar for broad searches</strong> provide complementary approaches for keeping track of the latest publications.</p>]]></content><author><name></name></author><category term="productivity"/><category term="research"/><summary type="html"><![CDATA[How I keep up with all the developments in my field of research]]></summary></entry><entry><title type="html">Ferdium: the One Chat Platform to Rule Them All</title><link href="https://kszenes.github.io/blog/2025/Ferdium/" rel="alternate" type="text/html" title="Ferdium: the One Chat Platform to Rule Them All"/><published>2025-02-01T00:00:00+00:00</published><updated>2025-02-01T00:00:00+00:00</updated><id>https://kszenes.github.io/blog/2025/Ferdium</id><content type="html" xml:base="https://kszenes.github.io/blog/2025/Ferdium/"><![CDATA[<h2 id="introduction">Introduction</h2> <p>I have been looking for a way of accessing my <strong>WhatsApp conversations from my Linux</strong> desktop. Unfortunately, <strong>no native Linux application</strong> has been developed, so I thought my only option was the WhatsApp web UI. The <strong>web interface</strong>, however, has been quite <strong>buggy</strong> and exhibits <strong>poor performance</strong>. Moreover, since I prevent cookies in my web browser, not only do I need to login every time with the QR code (which is a pain) but rejecting cookies also seems to interfere with the login process, preventing me entirely from loging in.</p> <p>In my search for an alternative that also supports the Linux operating system, I stumbled upon the open-source <a href="https://meetfranz.com/">Franz</a> program, hosted on <a href="https://github.com/meetfranz/franz">GitHub</a>. It provides an interface to <strong>all the common chat services in one place</strong>, including WhatsApp, which works great! However, Franz relies on a fremium business model, which <strong>limits the number of services</strong> that free-tier uses can use at one time and <strong>prevents the login of self-hosted chats</strong>, such as Zulip of Mattermost. This was quite inconvenient as I rely on them for work communications.</p> <h2 id="ferdium">Ferdium</h2> <p>I was delighted to find out that there is a <strong>fully free and open-source fork of Franz</strong> called <a href="https://ferdium.org/">Ferdium</a>, which <strong>removes all of its restrictions</strong>. It provides access to <strong>huge selection of messaging services</strong> from one place—many of which I have never even heard of.</p> <div style="display: flex; justify-content: center;"> <img src="/assets/img/blog/ferdium-services.png" style="max-width: 400px; height: auto;"/> </div> <div class="caption"> Subset of the services supported by Ferdium. </div> <p>In addition, it provides a slew of <strong>convenient keyboard shortcuts</strong> for navigating between the various services and contains various productivity features, such as integrated TODO lists to keep track of tasks. Best of all, since it is built using the <a href="https://www.electronjs.org/">Electron</a> framework, it is <strong>platform-agnostic</strong> and runs on Windows, Mac and, yes, Linux.</p> <h2 id="conclusion">Conclusion</h2> <p>Ferdium has been a <strong>game-changer</strong> for managing my <strong>messaging services across platforms</strong>. With Ferdium, I could say goodbye to the seemingly endlessly increasing number of chat service apps that I had downloaded on all my devices. If you are <strong>also overwhelmed</strong> by <strong>all</strong> these different <strong>messaging services</strong>, <strong>Ferdium</strong> might be the <strong>right tool for you</strong>!</p>]]></content><author><name></name></author><category term="productivity,"/><category term="microtip"/><summary type="html"><![CDATA[Access all your chat services from a single location]]></summary></entry><entry><title type="html">Display Images, PDFs, and GIFs Directly in Your Terminal</title><link href="https://kszenes.github.io/blog/2024/ImgCat/" rel="alternate" type="text/html" title="Display Images, PDFs, and GIFs Directly in Your Terminal"/><published>2024-12-02T00:00:00+00:00</published><updated>2024-12-02T00:00:00+00:00</updated><id>https://kszenes.github.io/blog/2024/ImgCat</id><content type="html" xml:base="https://kszenes.github.io/blog/2024/ImgCat/"><![CDATA[<figure> <video src="/assets/video/blog/imgcat-example.mp4" class="img-fluid rounded z-depth-1" width="auto" height="auto" autoplay="" controls="" loop="" muted=""/> <figcaption class="caption">Viewing JPEGs, PDFs and even GIFs directly in the terminal.</figcaption> </figure> <h2 id="introduction">Introduction</h2> <p>Did you know that modern terminal emulators are capable of <strong>displaying</strong> many file formats, including <strong>images, PDFs and GIFs</strong> directly in the <strong>terminal</strong>? This can be <strong>particularly useful</strong> when connected to a <strong>remote SSH server</strong>. Although similar functionality may be achieved using X11 forwarding, this feature is not always enabled on remote servers. In addition, the X11 protocol tends to be quite slow, since it needs to forward the entire graphical user interface (GUI) application, rendering it unpractical for quickly viewing images.</p> <h2 id="setup">Setup</h2> <p>Many modern terminal emulators support various protocols for visualizing images in the terminal. In this post, we will focus on the <a href="https://iterm2.com/">iTerm2</a> and the <a href="https://sw.kovidgoyal.net/kitty/">Kitty</a> terminal emulators, since these are the ones that I use on my Mac and Linux computers, respectively.</p> <h3 id="iterm2">iTerm2</h3> <p>In order for <code class="language-plaintext highlighter-rouge">iTerm2</code> to display images, its <a href="https://iterm2.com/documentation-utilities.html">Utilities Package</a> needs to be installed. This can be done by navigating in the menu bar to <code class="language-plaintext highlighter-rouge">iTerm2 &gt; Install Shell Integration</code>. A popup will open in which the “Also install iTerm2 Utilities” option needs to be selected.</p> <figure> <picture> <source class="responsive-img-srcset" srcset="/assets/img/blog/iterm-shell-integration.png" sizes="95vw"/> <img src="/assets/img/blog/iterm-shell-integration.png" class="img-fluid rounded z-depth-1" width="100%" height="auto" loading="eager" onerror="this.onerror=null; $('.responsive-img-srcset').remove();"/> </picture> </figure> <p>The utilities may then either be installed using local copy or the latest version of the tools may be fetched from a remote repository. I recommend the latter method, which should provide better compatibility with the latest version of <code class="language-plaintext highlighter-rouge">iTerm2</code>. The command automatically pulls a number of useful shell scripts from a remote <a href="https://github.com/gnachman/iTerm2-shell-integration/tree/main/utilities">Git repository</a>, which extend the functionality of <code class="language-plaintext highlighter-rouge">iTerm2</code>. Note that, if preferred, each individual script may be manually installed by simply placing them somewhere in your <code class="language-plaintext highlighter-rouge">PATH</code>. The one that we are interested in is the <code class="language-plaintext highlighter-rouge">imgcat</code> script. Once it has been installed, various image formats (JPG, PNG, etc…), PDF and even animated GIF may be displayed directly in the terminal using</p> <div class="language-sh highlighter-rouge"><div class="highlight"><pre class="highlight"><code>imgcat image.ext
</code></pre></div></div> <p>The script comes with a number of command line options that are listed in its help page, accessible with <code class="language-plaintext highlighter-rouge">imgcat --help</code>. Noteworthy flags include <code class="language-plaintext highlighter-rouge">-H</code> and <code class="language-plaintext highlighter-rouge">-W</code>, which configure the height and width of the images, and the <code class="language-plaintext highlighter-rouge">-u/--url</code> with which arbitrary images can be fetched from the internet using a URL.</p> <blockquote> <h4 id="tip">Tip</h4> <p>Since, by default, <code class="language-plaintext highlighter-rouge">imgcat</code> preserves the original size of the image–leading to vastly varying sizes of the displayed images–I prefer setting a fixed height of the image (in my case 33% of the terminal window) such that images are displayed using a consistent size. This can be done by passing the <code class="language-plaintext highlighter-rouge">-H 33%</code> flag to <code class="language-plaintext highlighter-rouge">imgcat</code>. I use an alias to overwrite the default behavior: <code class="language-plaintext highlighter-rouge">alias imgcat="imgcat -H 33%"</code>.</p> </blockquote> <h3 id="kitty">Kitty</h3> <p>For the <code class="language-plaintext highlighter-rouge">kitty</code> terminal, this feature is part of a set of extensions–called <a href="https://sw.kovidgoyal.net/kitty/kittens_intro/">kittens</a>–many of which provide similar functionality to the <code class="language-plaintext highlighter-rouge">iTerm2</code> utility scripts. The <code class="language-plaintext highlighter-rouge">icat</code> kitten, which can be display images in the terminal, requires the <a href="https://www.imagemagick.org/">ImageMagick</a> program as a dependency for performing some of the image manipulations. Once, these have been installed, images may be viewing using:</p> <div class="language-sh highlighter-rouge"><div class="highlight"><pre class="highlight"><code>kitten icat image.ext
</code></pre></div></div> <p>The <code class="language-plaintext highlighter-rouge">icat</code> <code class="language-plaintext highlighter-rouge">kitten</code> also comes with a number of options which are listed in its help page.</p> <h3 id="enabling-use-through-ssh">Enabling use through SSH</h3> <p>Viewing images in the terminal becomes an <strong>essential feature</strong> in the context where <strong>GUI applications are not available</strong>, as in the case of an SSH connection to a remote server. Thankfully, both the <code class="language-plaintext highlighter-rouge">iTerm2</code> and <code class="language-plaintext highlighter-rouge">kitty</code> protocols <strong>work seamlessly</strong> even <strong>through SSH</strong>. All that needs to be done is to also install the <code class="language-plaintext highlighter-rouge">iTerm2</code> <code class="language-plaintext highlighter-rouge">imgcat</code> script (following the procedure described above) or the <code class="language-plaintext highlighter-rouge">kitty</code> terminal on the remote server.</p> <h4 id="automatically-dispatching-to-iterm2-or-kitty">Automatically Dispatching to iTerm2 or Kitty</h4> <p>Note that the <code class="language-plaintext highlighter-rouge">iTerm2</code> and <code class="language-plaintext highlighter-rouge">kitty</code> protocols are not compatible. Therefore, if the <code class="language-plaintext highlighter-rouge">iTerm2</code> terminal emulator was used to SSH into the remote server then the <code class="language-plaintext highlighter-rouge">kitten icat</code> command will not work. Therefore, it would be convenient to configure the shell on the remote server to <strong>detect the terminal</strong> that was used to SSH and, based on that, <strong>automatically dispatch</strong> to the appropriate command. This can be achieved by storing the terminal emulator in use in an environment variable on the host and then sending it to the remote server. In the <code class="language-plaintext highlighter-rouge">iTerm2</code> settings enable the <code class="language-plaintext highlighter-rouge">Advanced &gt; Experimental Features &gt; Set LC_TERMINAL=iTerm2</code> option. This will set the <code class="language-plaintext highlighter-rouge">LC_TERMINAL</code> environment variable to <code class="language-plaintext highlighter-rouge">iTerm2</code> whenever a shell is started in <code class="language-plaintext highlighter-rouge">iTerm2</code>.</p> <p>Now, this environment variable needs to be propagated to the remote server. The <code class="language-plaintext highlighter-rouge">iTerm2</code> documentation states that <code class="language-plaintext highlighter-rouge">OpenSSH</code> passes this environment variable by default to the remote servers. However, this doesn’t seem to be the case for me. In any case, environment variables may be sent explicitly to the remote server by setting the option <code class="language-plaintext highlighter-rouge">SendEnv LC_TERMINAL</code> in the <code class="language-plaintext highlighter-rouge">~/.ssh/config</code> file. This option can be enabled for all servers using the following wildcard at the top of the configuration:</p> <div class="language-config highlighter-rouge"><div class="highlight"><pre class="highlight"><code><span class="n">Host</span> *
  <span class="n">SendEnv</span> <span class="n">LC_TERMINAL</span>
</code></pre></div></div> <blockquote> <p>Note that in order for this to work, the remote server needs to be configured such that it accepts sent environment variables from the host. Further information on enabling this feature can be found by consulting the <code class="language-plaintext highlighter-rouge">sshd_config</code> <code class="language-plaintext highlighter-rouge">man</code> pages (see for instance the <code class="language-plaintext highlighter-rouge">AcceptEnv</code> entry).</p> </blockquote> <p>On the remote server, inside the <code class="language-plaintext highlighter-rouge">.bashrc</code> or <code class="language-plaintext highlighter-rouge">.zshrc</code>, this environment variable may be queried and, accordingly, the <code class="language-plaintext highlighter-rouge">icat</code> command can be dispatched to the appropriate routine:</p> <div class="language-sh highlighter-rouge"><div class="highlight"><pre class="highlight"><code><span class="k">if</span> <span class="o">[</span> <span class="s2">"</span><span class="nv">$LC_TERMINAL</span><span class="s2">"</span> <span class="o">=</span> <span class="s2">"iTerm2"</span> <span class="o">]</span><span class="p">;</span> <span class="k">then
  </span><span class="nb">alias </span><span class="nv">icat</span><span class="o">=</span><span class="s2">"imgcat -H 33%"</span>
<span class="k">else
  </span><span class="nb">alias </span><span class="nv">icat</span><span class="o">=</span><span class="s2">"kitten icat"</span>
<span class="k">fi</span>
</code></pre></div></div> <blockquote> <h4 id="waring-compatibility-with-tmux">Waring: Compatibility with <code class="language-plaintext highlighter-rouge">tmux</code></h4> <p>Unfortunately, in my case, both of these methods failed inside of <code class="language-plaintext highlighter-rouge">tmux</code> sessions. For some users, this is resolved by enabling the <code class="language-plaintext highlighter-rouge">set -gq allow-passthrough</code> in the <code class="language-plaintext highlighter-rouge">tmux</code> configuration.</p> </blockquote> <h2 id="conclusion">Conclusion</h2> <p>Terminal emulators have <strong>come a long way</strong> from their initial exclusively <strong>text-based input/output</strong> modality. Today, they offer a surprising array of features, including the ability to <strong>display images, PDFs and GIFs</strong> directly within the terminal. This functionality is a <strong>game-changer</strong>, particularly for <strong>remote work</strong>, where traditional graphical interfaces may not be available or feasible.</p>]]></content><author><name></name></author><category term="productivity"/><summary type="html"><![CDATA[Boost your workflow with this powerful feature, especially when working remotely via SSH]]></summary></entry><entry><title type="html">Turn Off The Lights</title><link href="https://kszenes.github.io/blog/2024/DarkMode/" rel="alternate" type="text/html" title="Turn Off The Lights"/><published>2024-11-11T00:00:00+00:00</published><updated>2024-11-11T00:00:00+00:00</updated><id>https://kszenes.github.io/blog/2024/DarkMode</id><content type="html" xml:base="https://kszenes.github.io/blog/2024/DarkMode/"><![CDATA[<h2 id="introduction">Introduction</h2> <p>Has years of staring, in a dimly lit room, at a dark mode terminal or text editor made you no longer accustomed to the blinding white pages of most applications? While many programs, such as email readers, come with a good native dark mode, some of the most common file formats including HTML web pages and PDFs are usually displayed using their default white background color.</p> <p>In this blog post, we discuss methods of viewing these file formats with an appearance that is more pleasant on the eye.</p> <h2 id="browser">Browser</h2> <h3 id="web-pages">Web Pages</h3> <p>For the browser, there is a neat extension called <a href="https://darkreader.org/">Dark Reader</a> which dynamically modifies the CSS of the webpage in order to render it in dark mode. The extension is available on both Firefox and Chromium-based web browsers. It also comes with a slew of customization options, ranging from selectively disabling the extension on certain web pages that you would rather render in their native appearance, to custom filters, which determine how the CSS is modified.</p> <p>Below, you can find two examples of the extension in action. It works both on static web pages, such as Wikipedia, and dynamic ones like Google Maps.</p> <div class="row mt-3"> <div class="col-sm mt-3 mt-md-0"> <figure> <picture> <source class="responsive-img-srcset" srcset="/assets/img/blog/wiki-light.png" sizes="95vw"/> <img src="/assets/img/blog/wiki-light.png" class="img-fluid rounded z-depth-1" width="100%" height="auto" data-zoomable="" loading="eager" onerror="this.onerror=null; $('.responsive-img-srcset').remove();"/> </picture> </figure> </div> <div class="col-sm mt-3 mt-md-0"> <figure> <picture> <source class="responsive-img-srcset" srcset="/assets/img/blog/wiki-dark.png" sizes="95vw"/> <img src="/assets/img/blog/wiki-dark.png" class="img-fluid rounded z-depth-1" width="100%" height="auto" data-zoomable="" loading="eager" onerror="this.onerror=null; $('.responsive-img-srcset').remove();"/> </picture> </figure> </div> </div> <div class="row mt-3"> <div class="col-sm mt-3 mt-md-0"> <figure> <picture> <source class="responsive-img-srcset" srcset="/assets/img/blog/gmaps-light.png" sizes="95vw"/> <img src="/assets/img/blog/gmaps-light.png" class="img-fluid rounded z-depth-1" width="100%" height="auto" data-zoomable="" loading="eager" onerror="this.onerror=null; $('.responsive-img-srcset').remove();"/> </picture> </figure> </div> <div class="col-sm mt-3 mt-md-0"> <figure> <picture> <source class="responsive-img-srcset" srcset="/assets/img/blog/gmaps-dark.png" sizes="95vw"/> <img src="/assets/img/blog/gmaps-dark.png" class="img-fluid rounded z-depth-1" width="100%" height="auto" data-zoomable="" loading="eager" onerror="this.onerror=null; $('.responsive-img-srcset').remove();"/> </picture> </figure> </div> </div> <div class="caption"> Native web page (left) and dark mode web page using Dark Reader (right) </div> <h3 id="pdfs">PDFs</h3> <p>Note that web browsers often block extensions from functioning on protected URLs, such as configuration pages and local files (e.g., PDFs). Therefore, if you use your web browser as your PDF viewer, you will not be able to rely on Dark Reader for providing a pleasant reading experience.</p> <p>There is, however, a workaround for Firefox users. Create a custom bookmark with a URL given by the following javascript code (adapted from this <a href="https://stackoverflow.com/questions/61814564/how-can-i-enable-dark-mode-when-viewing-a-pdf-file-in-firefox">StackOverflow post</a>):</p> <div class="language-plaintext highlighter-rouge"><div class="highlight"><pre class="highlight"><code>javascript:(function(){var el = typeof viewer !== 'undefined' ? viewer : document.body; el.style.filter = 'invert(1) contrast(75%)';})()
</code></pre></div></div> <p>While viewing a PDF in Firefox, clicking on this bookmark will invert the colors of the PDF and decrease the contrast such that it is lighter on the eyes – effectively performing a poor man’s dark mode.</p> <h2 id="pdf-viewer">PDF viewer</h2> <p>For a better dark mode experience with PDFs, I would recommend using a dedicated PDF viewer which has a native dark mode option. If you are comfortable with Vim motions, there are two great options, the well-established <a href="https://pwmt.org/projects/zathura/">Zathura</a> program and the newer feature-rich <a href="https://sioyek.info/">Sioyek</a> reader, which provide a dark mode out of the box.</p> <blockquote> <h5 id="warning">Warning</h5> <p class="block-warning">These PDF readers heavily rely on keyboard shortcuts, in particular Vim motions, and might not be appropriate for novices.</p> </blockquote> <p>While I am content with Sioyek’s default dark mode, the one from Zathura simply inverts the colors which makes for an aggressive appearance since the white background is turned into pitch black. Therefore, I prefer setting the colors to a more tamed dark blue color (similar to the Nord colorscheme). This can be achieved by adding the following configuration to the Zathura config file:</p> <div class="language-plaintext highlighter-rouge"><div class="highlight"><pre class="highlight"><code>set default-bg          "#282a36" # Background
set default-fg          "#f8f8f2" # Foreground
set recolor-lightcolor  "#282a36" # Background
set recolor-darkcolor   "#f8f8f2" # Foreground
</code></pre></div></div> <div class="row mt-3"> <div class="col-sm mt-3 mt-md-0"> <figure> <picture> <source class="responsive-img-srcset" srcset="/assets/img/blog/pdf-white.png" sizes="95vw"/> <img src="/assets/img/blog/pdf-white.png" class="img-fluid rounded z-depth-1" width="100%" height="auto" data-zoomable="" loading="eager" onerror="this.onerror=null; $('.responsive-img-srcset').remove();"/> </picture> </figure> </div> <div class="col-sm mt-3 mt-md-0"> <figure> <picture> <source class="responsive-img-srcset" srcset="/assets/img/blog/pdf-black.png" sizes="95vw"/> <img src="/assets/img/blog/pdf-black.png" class="img-fluid rounded z-depth-1" width="100%" height="auto" data-zoomable="" loading="eager" onerror="this.onerror=null; $('.responsive-img-srcset').remove();"/> </picture> </figure> </div> <div class="col-sm mt-3 mt-md-0"> <figure> <picture> <source class="responsive-img-srcset" srcset="/assets/img/blog/pdf-nord.png" sizes="95vw"/> <img src="/assets/img/blog/pdf-nord.png" class="img-fluid rounded z-depth-1" width="100%" height="auto" data-zoomable="" loading="eager" onerror="this.onerror=null; $('.responsive-img-srcset').remove();"/> </picture> </figure> </div> </div> <div class="caption"> Example of Zathura dark mode: original PDF (left), native dark mode (middle) and customized dark mode (right) </div> <h2 id="zotero">Zotero</h2> <p>If you spend a lot of time reading academic publications using the <a href="https://www.zotero.org/">Zotero</a> reference manager, you will be happy to hear that it can also be configured with dark mode functionality. The recent release of Zotero 7 now incorporates native support for dark mode. However, similar to the default dark mode of Zathura, it essentially just inverts the colors leading to a harsh visual experience. Thankfully, there is a plugin called <a href="https://github.com/tefkah/zotero-night">zotero-night</a> (compatible with Zotero 6), which provides a much more muted colorscheme and is, therefore, my preferred method of choice.</p> <div class="row mt-3"> <div class="col-sm mt-3 mt-md-0"> <figure> <picture> <source class="responsive-img-srcset" srcset="/assets/img/blog/zotero-light.png" sizes="95vw"/> <img src="/assets/img/blog/zotero-light.png" class="img-fluid rounded z-depth-1" width="100%" height="auto" data-zoomable="" loading="eager" onerror="this.onerror=null; $('.responsive-img-srcset').remove();"/> </picture> </figure> </div> <div class="col-sm mt-3 mt-md-0"> <figure> <picture> <source class="responsive-img-srcset" srcset="/assets/img/blog/zotero-dark.png" sizes="95vw"/> <img src="/assets/img/blog/zotero-dark.png" class="img-fluid rounded z-depth-1" width="100%" height="auto" data-zoomable="" loading="eager" onerror="this.onerror=null; $('.responsive-img-srcset').remove();"/> </picture> </figure> </div> <div class="col-sm mt-3 mt-md-0"> <figure> <picture> <source class="responsive-img-srcset" srcset="/assets/img/blog/zotero-7-dark.png" sizes="95vw"/> <img src="/assets/img/blog/zotero-7-dark.png" class="img-fluid rounded z-depth-1" width="100%" height="auto" data-zoomable="" loading="eager" onerror="this.onerror=null; $('.responsive-img-srcset').remove();"/> </picture> </figure> </div> </div> <div class="caption"> Zotero 6 original PDF (left), Zotero 6 zotero-night extension dark mode (middle), Zotero 7 native dark mode (right) </div>]]></content><author><name></name></author><category term="productivity"/><summary type="html"><![CDATA[How to dark mode everything]]></summary></entry><entry><title type="html">Pimp My `man`</title><link href="https://kszenes.github.io/blog/2024/Manpager/" rel="alternate" type="text/html" title="Pimp My `man`"/><published>2024-10-28T00:00:00+00:00</published><updated>2024-10-28T00:00:00+00:00</updated><id>https://kszenes.github.io/blog/2024/Manpager</id><content type="html" xml:base="https://kszenes.github.io/blog/2024/Manpager/"><![CDATA[<h2 id="introduction">Introduction</h2> <p>This article follows up on my previous blog <a href="/blog/2024/Cheatsheet/">post</a> on improving the experience of digging through the documentation of command line interface tools. In that article, I detailed my preferred method for fetching documentation using the <a href="cheat.sh">cheat.sh</a> website.</p> <p>This method, however, requires an internet connection. What if Microsoft decides to do another automatic software update, during the night, and crashes the worldwide web, again (looking at you <a href="https://en.wikipedia.org/wiki/2024_CrowdStrike-related_IT_outages">CrowdStrike</a>)? This would leave the rest of humanity with only the <code class="language-plaintext highlighter-rouge">man</code> pages to piece together all of human knowledge. Could we not make the experience of interacting with the <code class="language-plaintext highlighter-rouge">man</code> pages a bit more pleasant? That will be the goal of this article.</p> <h2 id="manpager">Manpager</h2> <p>Did you know that you can choose the application that is used for displaying the <code class="language-plaintext highlighter-rouge">man</code> pages? By default, it is set to the <code class="language-plaintext highlighter-rouge">less</code> pager, which doesn’t provide the best user experience due to its lack of proper syntax highlighting. The environment variable <code class="language-plaintext highlighter-rouge">MANPAGER</code> defines the program used for viewing the <code class="language-plaintext highlighter-rouge">man</code> pages.</p> <h3 id="bat"><code class="language-plaintext highlighter-rouge">bat</code></h3> <p>My favorite alternative to <code class="language-plaintext highlighter-rouge">less</code> is the <a href="https://github.com/sharkdp/bat">bat</a> program. It is part of series of common GNU CLI tools that have been rewritten in Rust, and often extended with additional functionality. This list includes <code class="language-plaintext highlighter-rouge">bat</code> as a drop-in replacement for <code class="language-plaintext highlighter-rouge">cat</code> and <code class="language-plaintext highlighter-rouge">less</code>, <a href="https://github.com/sharkdp/fd">fd</a> for <code class="language-plaintext highlighter-rouge">find</code> and <a href="https://github.com/BurntSushi/ripgrep">ripgrep</a> for <code class="language-plaintext highlighter-rouge">grep</code>. <code class="language-plaintext highlighter-rouge">bat</code> provides syntax highlighting for most programming languages and has even replaced <code class="language-plaintext highlighter-rouge">cat</code> and <code class="language-plaintext highlighter-rouge">less</code> for me entirely:</p> <div class="language-sh highlighter-rouge"><div class="highlight"><pre class="highlight"><code><span class="nb">alias </span><span class="nv">less</span><span class="o">=</span><span class="s2">"bat"</span>
<span class="nb">alias cat</span><span class="o">=</span><span class="s2">"bat -pp"</span>
</code></pre></div></div> <p>By default, <code class="language-plaintext highlighter-rouge">bat</code> acts like a pager similar to <code class="language-plaintext highlighter-rouge">less</code>. The <code class="language-plaintext highlighter-rouge">-pp</code> flag disables the paging option and prints the entire file, making <code class="language-plaintext highlighter-rouge">bat</code> function exactly like <code class="language-plaintext highlighter-rouge">cat</code>.</p> <p>Moreover, it can be used as the <code class="language-plaintext highlighter-rouge">MANPAGER</code> with the following command taken from their <a href="https://github.com/sharkdp/bat">README</a></p> <div class="language-sh highlighter-rouge"><div class="highlight"><pre class="highlight"><code><span class="nb">export </span><span class="nv">MANPAGER</span><span class="o">=</span><span class="s2">"sh -c 'col -bx | bat -l man -p'"</span>
</code></pre></div></div> <p>Check out the results:</p> <figure> <picture> <source class="responsive-img-srcset" srcset="/assets/img/blog/manpager_less_vs_bat.png" sizes="95vw"/> <img src="/assets/img/blog/manpager_less_vs_bat.png" class="img-fluid rounded z-depth-1" width="100%" height="auto" data-zoomable="" loading="eager" onerror="this.onerror=null; $('.responsive-img-srcset').remove();"/> </picture> </figure> <div class="caption"> Comparison of less (left) and bat (right) as Manpagers </div> <blockquote> <p>On my Mac, this command worked out of the box. However, on my Linux machine I was encountering formatting issues due to lingering color codes in the output (e.g., <code class="language-plaintext highlighter-rouge">1mgrep</code>). From the <code class="language-plaintext highlighter-rouge">bat</code> documentation, this issue can be resolved by setting the following environment variable <code class="language-plaintext highlighter-rouge">export MANROFFOPT="-c"</code></p> </blockquote> <h3 id="neovim">Neovim</h3> <p>Alternatively, you can use <code class="language-plaintext highlighter-rouge">neovim</code> as your <code class="language-plaintext highlighter-rouge">MANPAGER</code> which will even respect your color scheme</p> <div class="language-sh highlighter-rouge"><div class="highlight"><pre class="highlight"><code><span class="nb">export </span><span class="nv">MANPAGER</span><span class="o">=</span><span class="s1">'nvim +Man!'</span>
</code></pre></div></div> <figure> <picture> <source class="responsive-img-srcset" srcset="/assets/img/blog/manpager_less_vs_nvim.png" sizes="95vw"/> <img src="/assets/img/blog/manpager_less_vs_nvim.png" class="img-fluid rounded z-depth-1" width="100%" height="auto" data-zoomable="" loading="eager" onerror="this.onerror=null; $('.responsive-img-srcset').remove();"/> </picture> </figure> <div class="caption"> Comparison of less (left) and neovim (right) as Manpagers </div> <p>However, since it also loads all of your plugins (unless you were diligent in setting up lazy loading of packages), it will necessarily be a bit slower than <code class="language-plaintext highlighter-rouge">bat</code>, which is why I use it instead.</p> <hr/> <h2 id="source">Source</h2> <p>I was made aware of the <code class="language-plaintext highlighter-rouge">MANPAGER</code> environment variable by this <a href="https://www.youtube.com/watch?v=ab3rY0X5kD4">video</a> from DistroTube. Go check him out, he makes great Linux related content!</p>]]></content><author><name></name></author><category term="productivity,"/><category term="microtip"/><summary type="html"><![CDATA[Replace the default `man` pager with something with a bit more bling]]></summary></entry><entry><title type="html">Convenient Online Cheat Sheets</title><link href="https://kszenes.github.io/blog/2024/Cheatsheet/" rel="alternate" type="text/html" title="Convenient Online Cheat Sheets"/><published>2024-10-21T00:00:00+00:00</published><updated>2024-10-21T00:00:00+00:00</updated><id>https://kszenes.github.io/blog/2024/Cheatsheet</id><content type="html" xml:base="https://kszenes.github.io/blog/2024/Cheatsheet/"><![CDATA[<h2 id="introduction">Introduction</h2> <p>Do you often find yourself forgetting common flags for command line interface (CLI) tools? Do you wonder if there are certain use cases of terminal utilities that you, perhaps, haven’t even thought of? While most programs contain extensive documentation in their <code class="language-plaintext highlighter-rouge">man</code> pages, I think that it is fair to say that this format is not always the easiest to navigate and can be quite dense.</p> <h2 id="cheatsh">cheat.sh</h2> <p>In comes <a href="https://www.cht.sh">cheat.sh</a> (or <code class="language-plaintext highlighter-rouge">cht.sh</code> for short), a website that hosts a community-driven set of cheat sheets for most programming languages, tools and utilities. The best part is that it is designed to work seamlessly from the terminal using the <code class="language-plaintext highlighter-rouge">curl</code> command which is available on most systems by default, so all you really need is an internet connection. The <code class="language-plaintext highlighter-rouge">cht.sh</code> homepage serves as a tutorial on how to use the repository and exposes its capabilities:</p> <div class="language-text highlighter-rouge"><div class="highlight"><pre class="highlight"><code>$ curl cht.sh
      _                _         _    __
  ___| |__   ___  __ _| |_   ___| |__ \ \      The only cheat sheet you need
 / __| '_ \ / _ \/ _` | __| / __| '_ \ \ \     Unified access to the best
| (__| | | |  __/ (_| | |_ _\__ \ | | |/ /     community driven documentation
 \___|_| |_|\___|\__,_|\__(_)___/_| |_/_/      repositories of the world

+------------------------+ +------------------------+ +------------------------+
| $ curl cheat.sh/ls     | | $ cht.sh btrfs         | | $ cht.sh lua/:learn    |
| $ curl cht.sh/btrfs    | | $ cht.sh tar~list      | | Learn any* programming |
| $ curl cht.sh/tar~list | |                        | | language not leaving   |
| $ curl https://cht.sh  | |                        | | your shell             |
|                        | |                        | | *) any of 60           |
|                        | |                        | |                        |
+-- queries with curl ---+ +- own optional client --+ +- learn, learn, learn! -+
+------------------------+ +------------------------+ +------------------------+
| $ cht.sh go/f&lt;tab&gt;&lt;tab&gt;| | $ cht.sh --shell       | | $ cht.sh go zip lists  |
| go/for   go/func       | | cht.sh&gt; help           | | Ask any question using |
| $ cht.sh go/for        | | ...                    | | cht.sh or curl cht.sh: |
| ...                    | |                        | | /go/zip+lists          |
|                        | |                        | | (use /,+ when curling) |
|                        | |                        | |                        |
+---- TAB-completion ----+ +-- interactive shell ---+ +- programming questions-+
+------------------------+ +------------------------+ +------------------------+
| $ curl cht.sh/:help    | | $ vim prg.py           | | $ time curl cht.sh/    |
| see /:help and /:intro | | ...                    | | ...                    |
| for usage information  | | zip lists _            | | real    0m0.075s       |
| and README.md on GitHub| | &lt;leader&gt;KK             | |                        |
| for the details        | |             *awesome*  | |                        |
|            *start here*| |                        | |                        |
+--- self-documented ----+ +- queries from editor! -+ +---- instant answers ---+

[Follow @igor_chubin for updates][github.com/chubin/cheat.sh]
</code></pre></div></div> <h3 id="example-with-grep">Example with <code class="language-plaintext highlighter-rouge">grep</code></h3> <p>For instance, if you want to see which flag to pass to <code class="language-plaintext highlighter-rouge">grep</code> in order to filter all lines in a file that <strong>don’t contain</strong> a specific search query, you could consult the cheat sheet for <code class="language-plaintext highlighter-rouge">grep</code>:</p> <div class="language-bash highlighter-rouge"><div class="highlight"><pre class="highlight"><code><span class="nv">$ </span>curl cht.sh/grep
<span class="c"># To search a file for a pattern:</span>
<span class="nb">grep</span> &lt;pattern&gt; &lt;file&gt;

<span class="c"># To perform a case-insensitive search (with line numbers):</span>
<span class="nb">grep</span> <span class="nt">-in</span> &lt;pattern&gt; &lt;file&gt;

<span class="c"># To recursively grep for string &lt;pattern&gt; in &lt;dir&gt;:</span>
<span class="nb">grep</span> <span class="nt">-R</span> &lt;pattern&gt; &lt;<span class="nb">dir</span><span class="o">&gt;</span>

<span class="c"># Read search patterns from a file (one per line):</span>
<span class="nb">grep</span> <span class="nt">-f</span> &lt;pattern-file&gt; &lt;file&gt;

<span class="c"># Find lines NOT containing pattern:</span>
<span class="nb">grep</span> <span class="nt">-v</span> &lt;pattern&gt; &lt;file&gt;

<span class="c"># Set how many lines to show before (-B) and after (-A) pattern:</span>
<span class="nb">grep</span> <span class="nt">-B</span> 3 <span class="nt">-A</span> 2 &lt;pattern&gt; &lt;file&gt;

<span class="c"># To grep with regular expressions:</span>
<span class="nb">grep</span> <span class="s2">"^00"</span> &lt;file&gt;                                               <span class="c"># Match lines starting with 00</span>
<span class="nb">grep</span> <span class="nt">-E</span> <span class="s2">"[0-9]{1,3}</span><span class="se">\.</span><span class="s2">[0-9]{1,3}</span><span class="se">\.</span><span class="s2">[0-9]{1,3}</span><span class="se">\.</span><span class="s2">[0-9]{1,3}"</span> &lt;file&gt; <span class="c"># Find IP add</span>

<span class="c"># To find all files that match &lt;pattern&gt; in &lt;dir&gt;</span>
<span class="nb">grep</span> <span class="nt">-rnw</span> &lt;<span class="nb">dir</span><span class="o">&gt;</span> <span class="nt">-e</span> &lt;pattern&gt;

<span class="c"># To exclude grep from your grepped output of ps:</span>
<span class="c"># (Add [] to the first letter. Ex: sshd -&gt; [s]shd)</span>
ps aux | <span class="nb">grep</span> <span class="s1">'[h]ttpd'</span>

<span class="c"># Colour in red {bash} and keep all other lines</span>
ps aux | <span class="nb">grep</span> <span class="nt">-E</span> <span class="nt">--color</span> <span class="s1">'bash|$'</span>

<span class="c"># (...)</span>
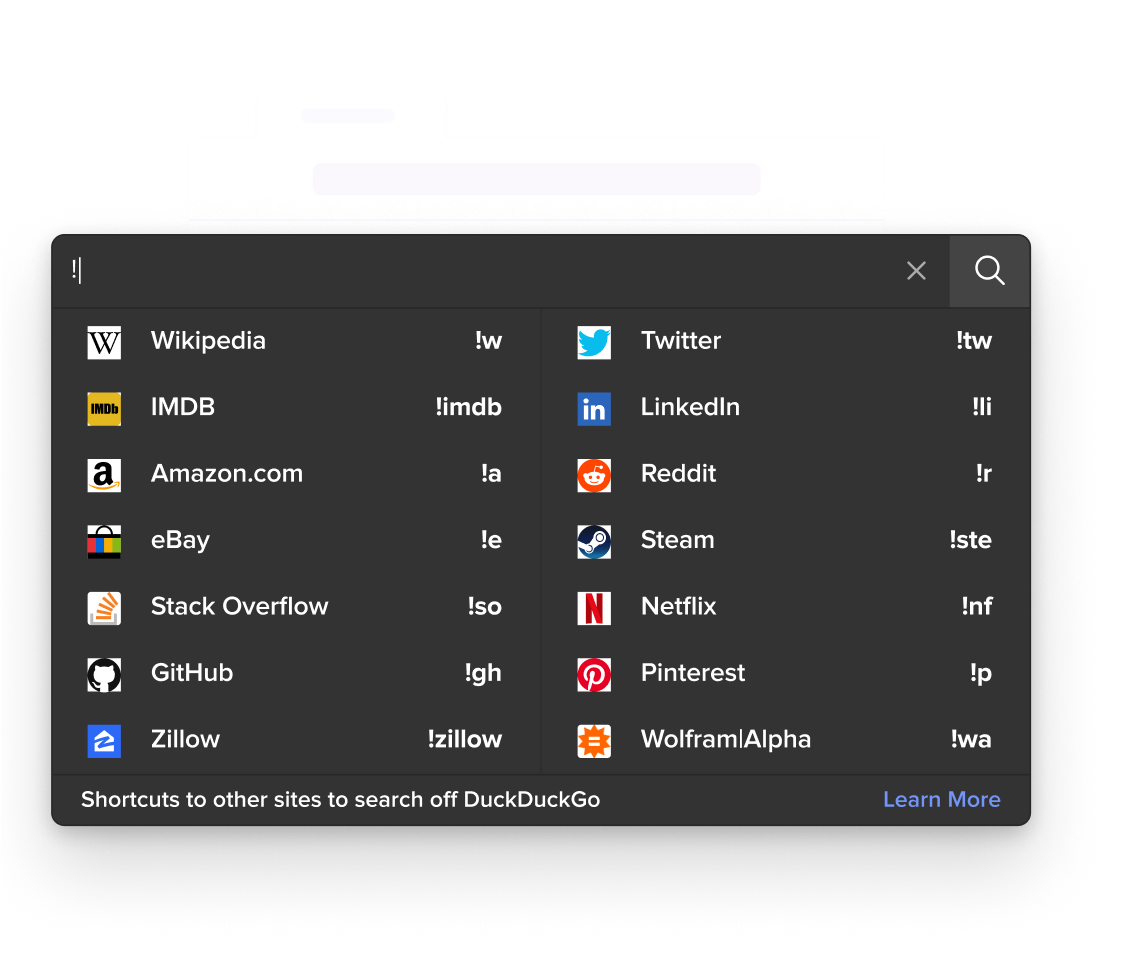
</code></pre></div></div> <p>The cheat sheet only lists the most common commands and doesn’t overwhelm the user with every single available option and flag. For our example, the fifth line from the above excerpt of the <code class="language-plaintext highlighter-rouge">grep</code> cheat sheet tells us that the <code class="language-plaintext highlighter-rouge">-v</code> flag is what we are looking for.</p> <blockquote> <p>Note that, while I mostly use <code class="language-plaintext highlighter-rouge">cht.sh</code> for quickly finding flags of CLI tools, this is only scratching the surface of what this resource has to offer. For instance, it has an extensive interface for learning programming languages, which can be quite useful. I encourage the interested reader to consult the <code class="language-plaintext highlighter-rouge">cht.sh</code> <a href="https://github.com/chubin/cheat.sh?tab=readme-ov-file">documentation</a> for further use cases.</p> </blockquote> <h2 id="combining-it-with-fzf">Combining it with <code class="language-plaintext highlighter-rouge">fzf</code></h2> <p>What would be quite neat is to be able to explore the available cheat sheets and dynamically select the desired one and preview it. For this purpose, I wrote a short script to combine the results from <code class="language-plaintext highlighter-rouge">cht.sh</code> with the popular <a href="https://github.com/junegunn/fzf">fzf</a> fuzzy finder command line tool.</p> <figure> <video src="/assets/video/blog/chtsh-demo.mp4" class="img-fluid rounded z-depth-1" width="auto" height="auto" autoplay="" controls="" loop="" muted=""/> <figcaption class="caption">Demo of cht.sh combined with fzf.</figcaption> </figure> <p>First, to obtain all available cheat sheets hosted on <code class="language-plaintext highlighter-rouge">cht.sh</code>, we can use the <code class="language-plaintext highlighter-rouge">:list</code> query. This returns a list of all available cheat sheets, which can then be piped to <code class="language-plaintext highlighter-rouge">fzf</code> in order to fuzzy search through the results. The currently selected item’s cheat sheet may be queried from <code class="language-plaintext highlighter-rouge">cht.sh</code> and displayed in <code class="language-plaintext highlighter-rouge">fzf</code>’s preview window.</p> <p>All this can be simply achieved using a short command which I aliased to <code class="language-plaintext highlighter-rouge">chtsh</code> for convenience:</p> <div class="language-bash highlighter-rouge"><div class="highlight"><pre class="highlight"><code><span class="nb">alias </span><span class="nv">chtsh</span><span class="o">=</span><span class="s2">"curl -s cht.sh/:list | fzf --preview 'curl -s cht.sh/{}'"</span>
</code></pre></div></div> <p>Note that the <code class="language-plaintext highlighter-rouge">-s</code> silences the progress bar of the <code class="language-plaintext highlighter-rouge">curl</code> command such that it is not overlaid on top of the <code class="language-plaintext highlighter-rouge">fzf</code> window. As shown in the above demo, the preview window maintains the syntax highlighting from the <code class="language-plaintext highlighter-rouge">curl</code> command and is fully scrollable.</p> <h2 id="fzf-configuration"><code class="language-plaintext highlighter-rouge">fzf</code> configuration</h2> <p><code class="language-plaintext highlighter-rouge">fzf</code> has a number of customization options that can be used to tweak its appearance and workflow to your liking. These configurations can be either passed as flags to the <code class="language-plaintext highlighter-rouge">fzf</code> command or set globally in the environment variable <code class="language-plaintext highlighter-rouge">FZF_DEFAULT_OPTS</code>. I use this variable to configure the location and size of the preview window as well as enable vim keybindings for scrolling the preview window (e.g., <code class="language-plaintext highlighter-rouge">&lt;C-u&gt;</code>: up, <code class="language-plaintext highlighter-rouge">&lt;C-d&gt;</code>: down):</p> <div class="language-bash highlighter-rouge"><div class="highlight"><pre class="highlight"><code><span class="nb">export </span><span class="nv">FZF_DEFAULT_OPTS</span><span class="o">=</span><span class="s2">"--preview-window=right,80%:wrap </span><span class="se">\</span><span class="s2">
     --bind ctrl-y:preview-up,ctrl-e:preview-down,ctrl-u:preview-half-page-up,ctrl-d:preview-half-page-down"</span>
</code></pre></div></div> <hr/> <h2 id="source">Source</h2> <p>This inspiration for this post comes from a great YouTube <a href="https://www.youtube.com/watch?v=hJzqEAf2U4I">video</a> by ThePrimeagen, which also introduced me to the <code class="language-plaintext highlighter-rouge">cht.sh</code> resource. In the video, he develops a short script which combines <code class="language-plaintext highlighter-rouge">cht.sh</code> and <code class="language-plaintext highlighter-rouge">fzf</code> with <code class="language-plaintext highlighter-rouge">tmux</code>. Actually, if you are an avid <code class="language-plaintext highlighter-rouge">tmux</code> user, his scripts can be adapted to my command for a truly smooth experience using the <code class="language-plaintext highlighter-rouge">cht.sh</code> facilities.</p>]]></content><author><name></name></author><category term="productivity"/><summary type="html"><![CDATA[The online ressource for quickly getting information on programming languages and command line tools]]></summary></entry><entry><title type="html">DuckDuckGo Bangs</title><link href="https://kszenes.github.io/blog/2024/DuckDuckGoBangs/" rel="alternate" type="text/html" title="DuckDuckGo Bangs"/><published>2024-09-23T00:00:00+00:00</published><updated>2024-09-23T00:00:00+00:00</updated><id>https://kszenes.github.io/blog/2024/DuckDuckGoBangs</id><content type="html" xml:base="https://kszenes.github.io/blog/2024/DuckDuckGoBangs/"><![CDATA[<h2 id="introduction">Introduction</h2> <p>Nowadays, most of the time when I use a search engine, I usually know on which website I want to arrive at, but I don’t know the exact URL. For instance, if I want to learn more about the 17th century Dutch Tulip Mania, I would usually start by checking out its Wikipedia page. Indeed, I would use “tulip mania wiki” as my search query and click on the first link (corresponding to the Wikipedia page). This process is pretty annoying, especially now that one needs to click through all the cookie menus when using Google as the search engine.</p> <h2 id="solution">Solution</h2> <figure> <video src="/assets/video/blog/ddg-bangs.mp4" class="img-fluid rounded z-depth-1" width="auto" height="auto" autoplay="" controls="" loop="" muted=""/> <figcaption class="caption">Example use cases of DuckDuckGo Bangs.</figcaption> </figure> <p>Since this is how I use search engines 99% of the time, wouldn’t it be nice if I could directly search the website, for instance Wikipedia, for the query, in this case “tulip mania”? One of the coolest native features of <a href="https://duckduckgo.com/">DuckDuckGo</a>, a privacy-centric search engine, which is lesser known (at least it was to me) is called DuckDuckGo bangs which enables precisely this. By starting a search query with a bang (an exclamation point) followed by a character code, corresponding to the website, and then the search query, DuckDuckGo directly issues the query to the website of interest and the user is immediately redirected to the page they were looking for. In our previous example, one would need to use the character code <code class="language-plaintext highlighter-rouge">w</code> corresponding to Wikipedia:</p> <div class="language-text highlighter-rouge"><div class="highlight"><pre class="highlight"><code>!w tulip mania
</code></pre></div></div> <h3 id="available-bangs">Available Bangs</h3> <figure> <picture> <source class="responsive-img-srcset" srcset="/assets/img/blog/ddg-bangs.png" sizes="95vw"/> <img src="/assets/img/blog/ddg-bangs.png" class="img-fluid rounded z-depth-1" width="100%" height="auto" loading="eager" onerror="this.onerror=null; $('.responsive-img-srcset').remove();"/> </picture> </figure> <p>DuckDuckGo Bangs supports a huge number of websites (13’567 as of the time of writing this blog post) containing all the major websites as well as many lesser known ones. The list of available bangs can be viewed on their <a href="https://duckduckgo.com/bangs">website</a>, and you can even make a suggestion for websites that have not been cataloged yet. Furthermore, if you simply use a bang followed by your search query without any character code, DuckDuckGo redirects you to the first search result (reminiscent of the “I’m feeling lucky” feature of Google). I use this all the time for lesser known websites that do not have their dedicated bang. In addition, this feature can be used when a bang opens up the search results page of the target website (instead of the closest match) to directly jump to the desired page (as in the case of Google Scholar in the last example form the video above).</p> <h4 id="most-used-bangs">Most used bangs</h4> <p>Here are a some of my most used bangs:</p> <table> <thead> <tr> <th>Bang</th> <th>Website</th> </tr> </thead> <tbody> <tr> <td><code class="language-plaintext highlighter-rouge">!</code></td> <td>I’m feeling lucky</td> </tr> <tr> <td><code class="language-plaintext highlighter-rouge">!w</code></td> <td>Wikipedia</td> </tr> <tr> <td><code class="language-plaintext highlighter-rouge">!gsc</code></td> <td>Google Scholar</td> </tr> <tr> <td><code class="language-plaintext highlighter-rouge">!gh</code></td> <td>GitHub</td> </tr> <tr> <td><code class="language-plaintext highlighter-rouge">!cpp</code></td> <td>Cpp Reference</td> </tr> <tr> <td><code class="language-plaintext highlighter-rouge">!pypi</code></td> <td>PyPi</td> </tr> <tr> <td><code class="language-plaintext highlighter-rouge">!g</code></td> <td>Google</td> </tr> </tbody> </table> <h3 id="compatibility-with-other-search-engines">Compatibility with other search engines</h3> <p>Now you might say, this looks cool and all but I don’t want to switch my entire search engine to DuckDuckGo because the search results are not as good as the ones from Google, with which I would totally agree. Personally, I prefer using a search engine called <a href="https://www.startpage.com/">StartPage</a> which fetches results from Google without tracking everything you do on the internet. Does this mean that you cannot benefit from this cool feature? Far from it. There are a number of plugins for Firefox and Chromium-based web browser plugins which augment your search bar with this feature while still relying on your search engine of choice for default queries. The plugin that I am currently using is <a href="https://addons.mozilla.org/en-US/firefox/addon/banger/">Banger</a> for Firefox, with which I am quite happy. However, there are a number of alternatives that are available by simply searching for “bangs” in the respective browser’s extension store.</p> <h4 id="mobile">Mobile</h4> <p>On mobile, I use the <a href="https://addons.mozilla.org/en-US/firefox/addon/yang-addon/">Yang! Yet Another Bangs</a> extension for the android Firefox app.</p>]]></content><author><name></name></author><category term="productivity"/><summary type="html"><![CDATA[DuckDuckGo's hidden feature which will turbo-charge your web searching]]></summary></entry></feed>